
Fuel iX API with Claude Code
Connect Claude Code to the Fuel iX API by installing Claude Code, configuring your API key, and running Claude from your project folder.
Coming from the Cline guide? See Migrating from Cline to Claude Code. This guide walks you through the full transition step by step.
Use this guide to connect Claude Code to the Fuel iX API, configure your API key, and start Claude from your project folder.
Claude Code is the recommended way to use the Fuel iX API from your terminal or IDE. It delivers the same Anthropic models as the Cline family of tools (Cline, Roo Code, Kilo Code) but with built-in prompt caching and subagent routing that significantly reduce per-request cost and latency.
If you are currently using Cline, Roo Code, or Kilo Code with the Fuel iX gateway, this guide replaces the Cline integration guide. Follow the steps below to migrate.
Prerequisites
Before you begin:
-
Install Node.js version 18 or newer from nodejs.org.
-
Check your installed version:
node -v -
If you installed Node.js on Windows, reopen PowerShell or Command Prompt so your
PATHrefreshes.
Step 1 — Get your API key
-
Open the Fuel iX Dev Portal.
For Dev Portal access instructions, see the Get Started page. -
Create a new project.
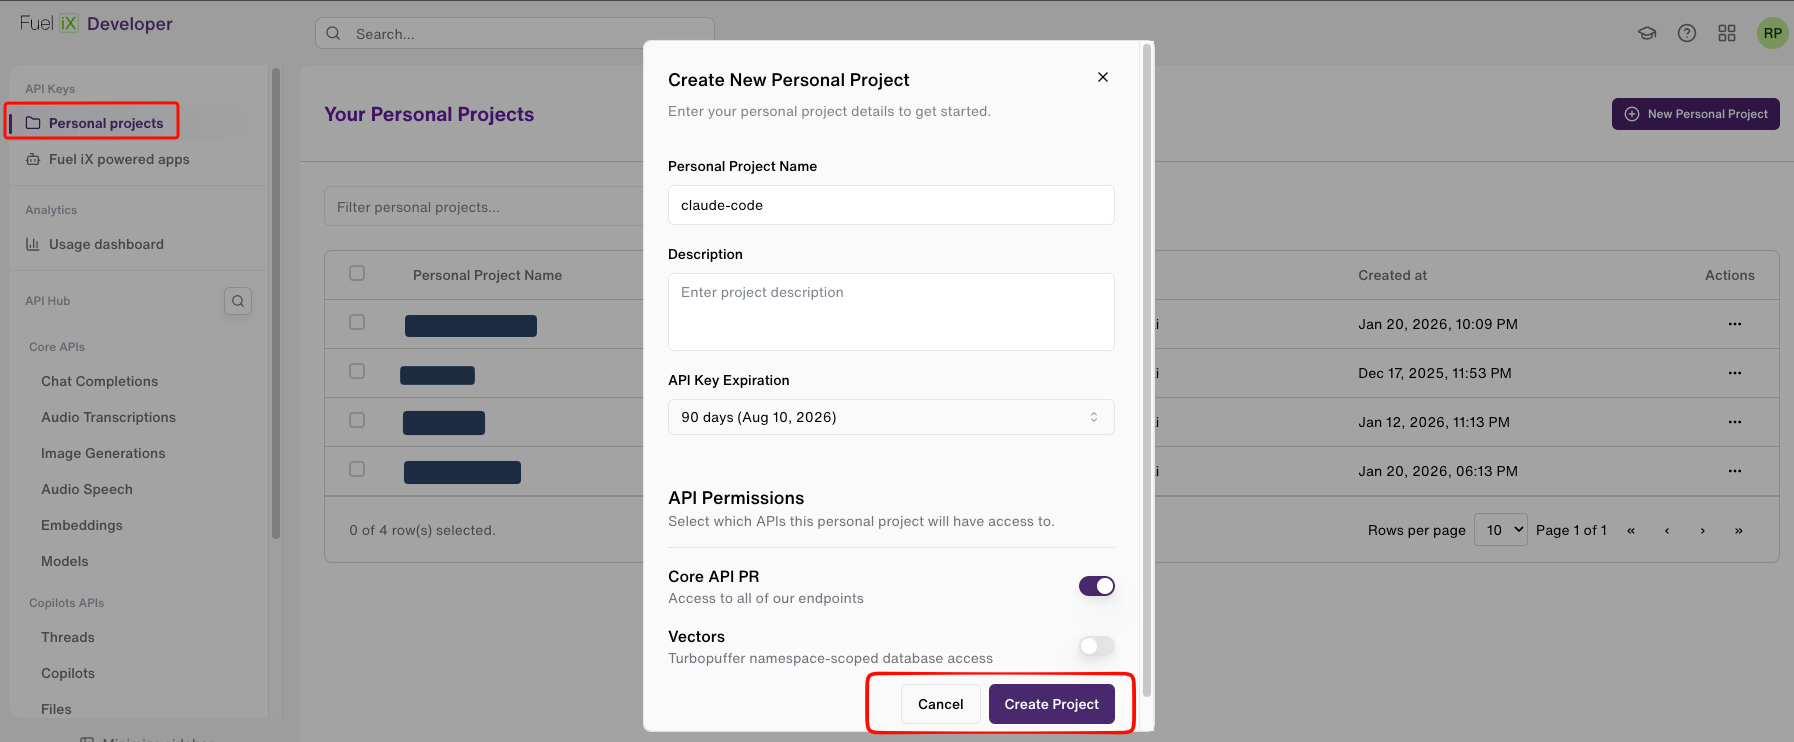
-
Once the project is created, a new API key is generated for your project.
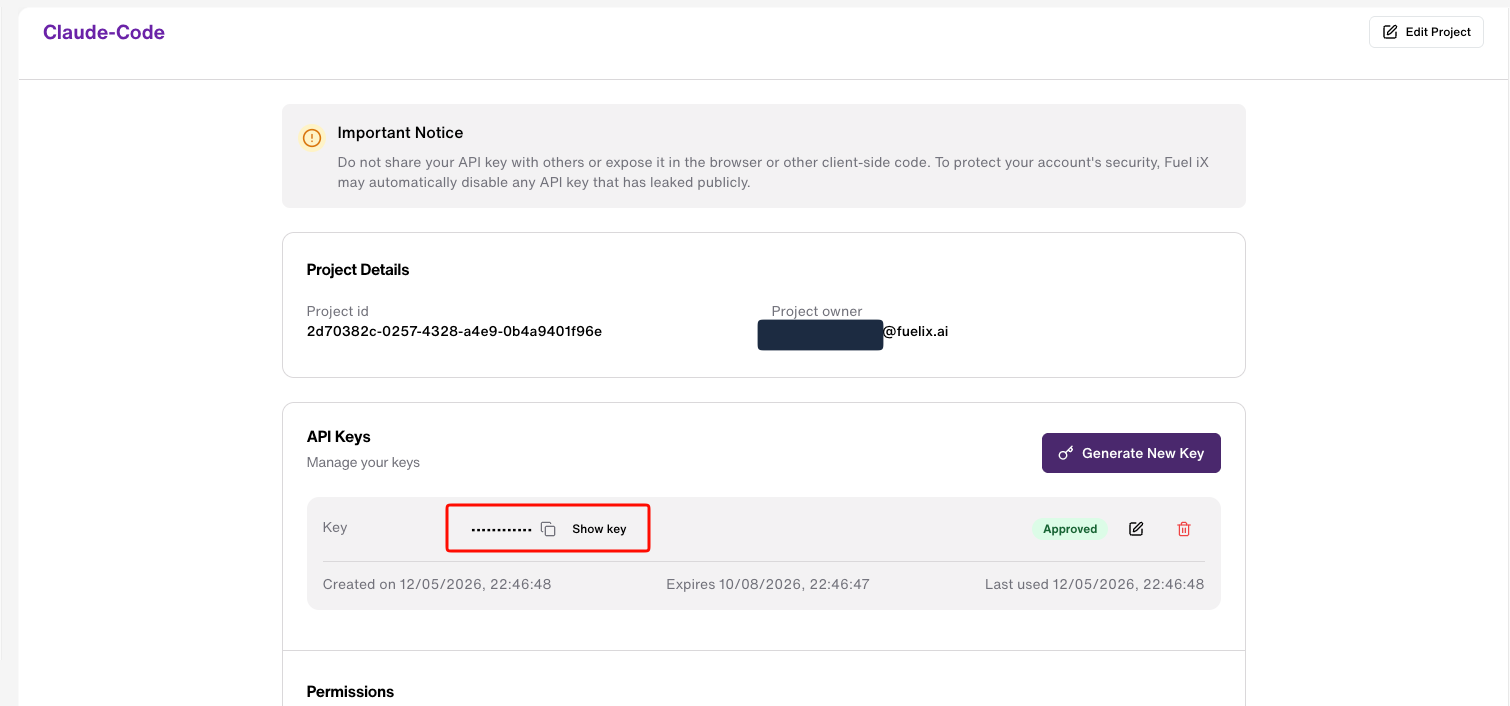
Copy the generated API key.
Store your API key securely. Never commit it to source control or share it in tickets, chat messages, or screenshots.
Step 2 — Open your terminal
Use the terminal for your operating system:
| Operating system | How to open the terminal |
|---|---|
| macOS | Press Command + Space, type Terminal, then press Enter. |
| Windows | Press the Windows key, type PowerShell or Command Prompt, then press Enter. |
You can paste commands into your terminal with Cmd + V on macOS or Ctrl + V on Windows. Some terminals also support right-click paste.
Step 3 — Install Claude Code
Install Claude Code for your operating system.
curl -fsSL https://claude.ai/install.sh | bashirm https://claude.ai/install.ps1 | iexStep 4 — Configure Claude Code
Create a Claude Code settings folder and add your Fuel iX API credentials.
Create the settings folder
mkdir -p ~/.claudeNew-Item -ItemType Directory -Force -Path $env:USERPROFILE\.claudeCreate the settings file
Open the Claude Code settings file in a text editor.
nano ~/.claude/settings.jsonnotepad $env:USERPROFILE\.claude\settings.jsonCopy the following JSON into the file. Replace YourAPIKEY with the API key you copied from the Fuel iX Dev Portal.
{
  "env": {
    "ANTHROPIC_BASE_URL": "https://api.fuelix.ai",
    "ANTHROPIC_AUTH_TOKEN": "YourAPIKEY"
  },
  "permissions": {
    "allow": []
  }
}
If you are using nano, save and exit:
- Press Ctrl + O.
- Press Enter.
- Press Ctrl + X.
Avoid setting
"allow": ["*"]unless you fully trust the workspace. That setting allows Claude Code to read and edit files and run terminal commands without prompting.
Step 5 — Complete onboarding
To bypass the initial setup screens, update the Claude Code onboarding file.
nano ~/.claude.jsonnotepad $env:USERPROFILE\.claude.jsonIf the file is empty, paste the following JSON:
{
  "hasCompletedOnboarding": true
}
If the file already has content, find hasCompletedOnboarding and set it to true.
If you are using nano, save and exit:
- Press Ctrl + O.
- Press Enter.
- Press Ctrl + X.
Step 6 — Run Claude
Start Claude Code from your project folder.
-
Navigate to your project folder:
cd documents/my-project -
Start Claude Code:
claude
Claude Code starts with the Fuel iX API base URL and authentication token from your settings file.
Optional: Use the Claude Code extension for VS Code
To use Claude Code in Visual Studio Code:
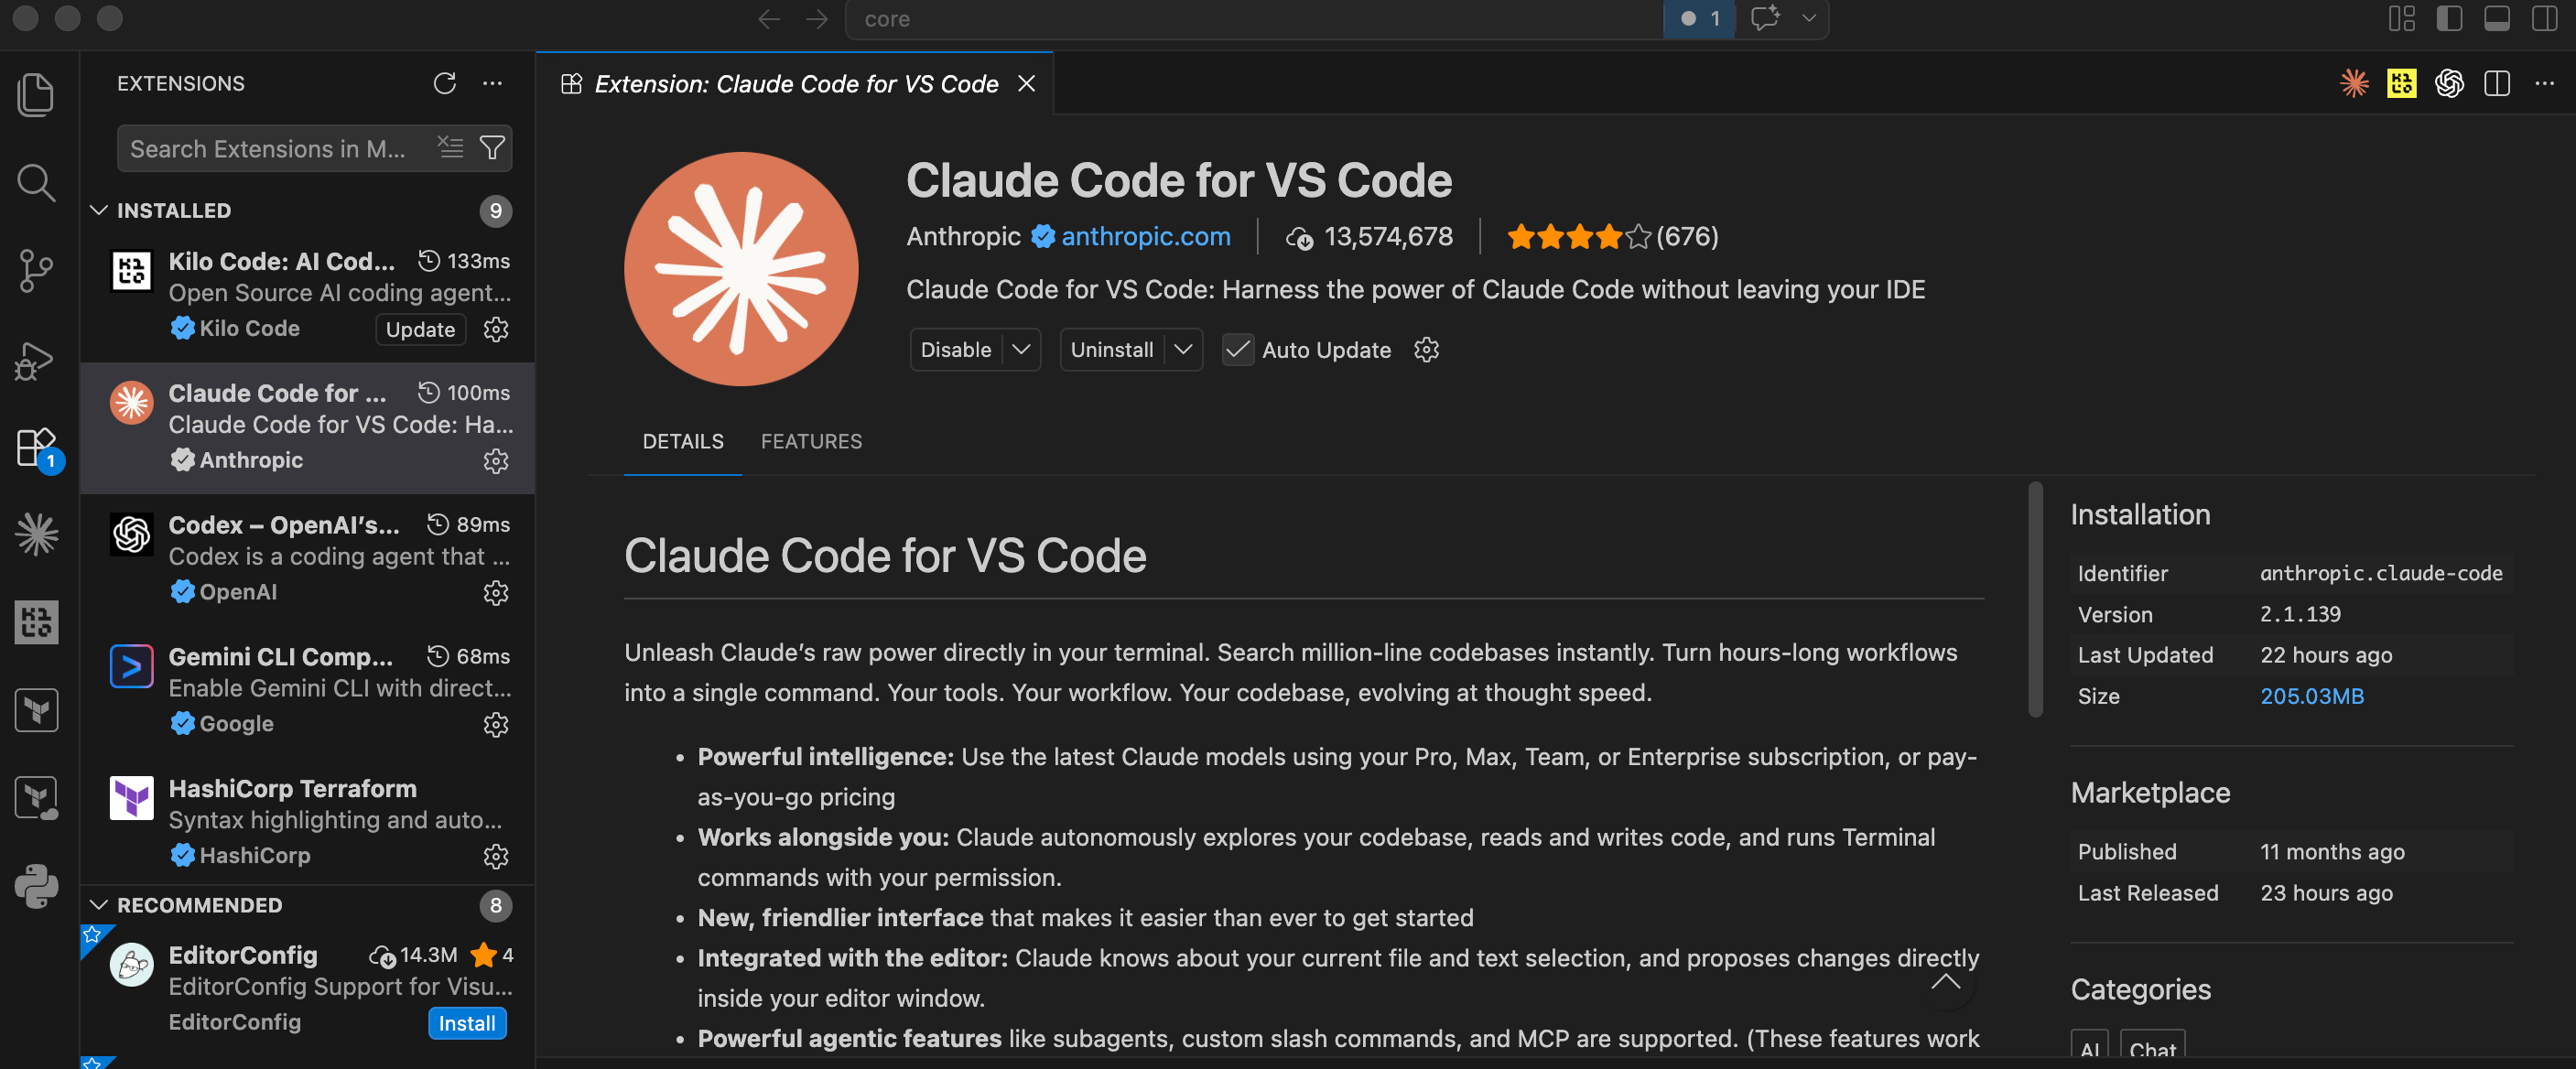
- Open VS Code.
- Go to Extensions with Ctrl + Shift + X.
- Search for Claude Code.
- Click Install.
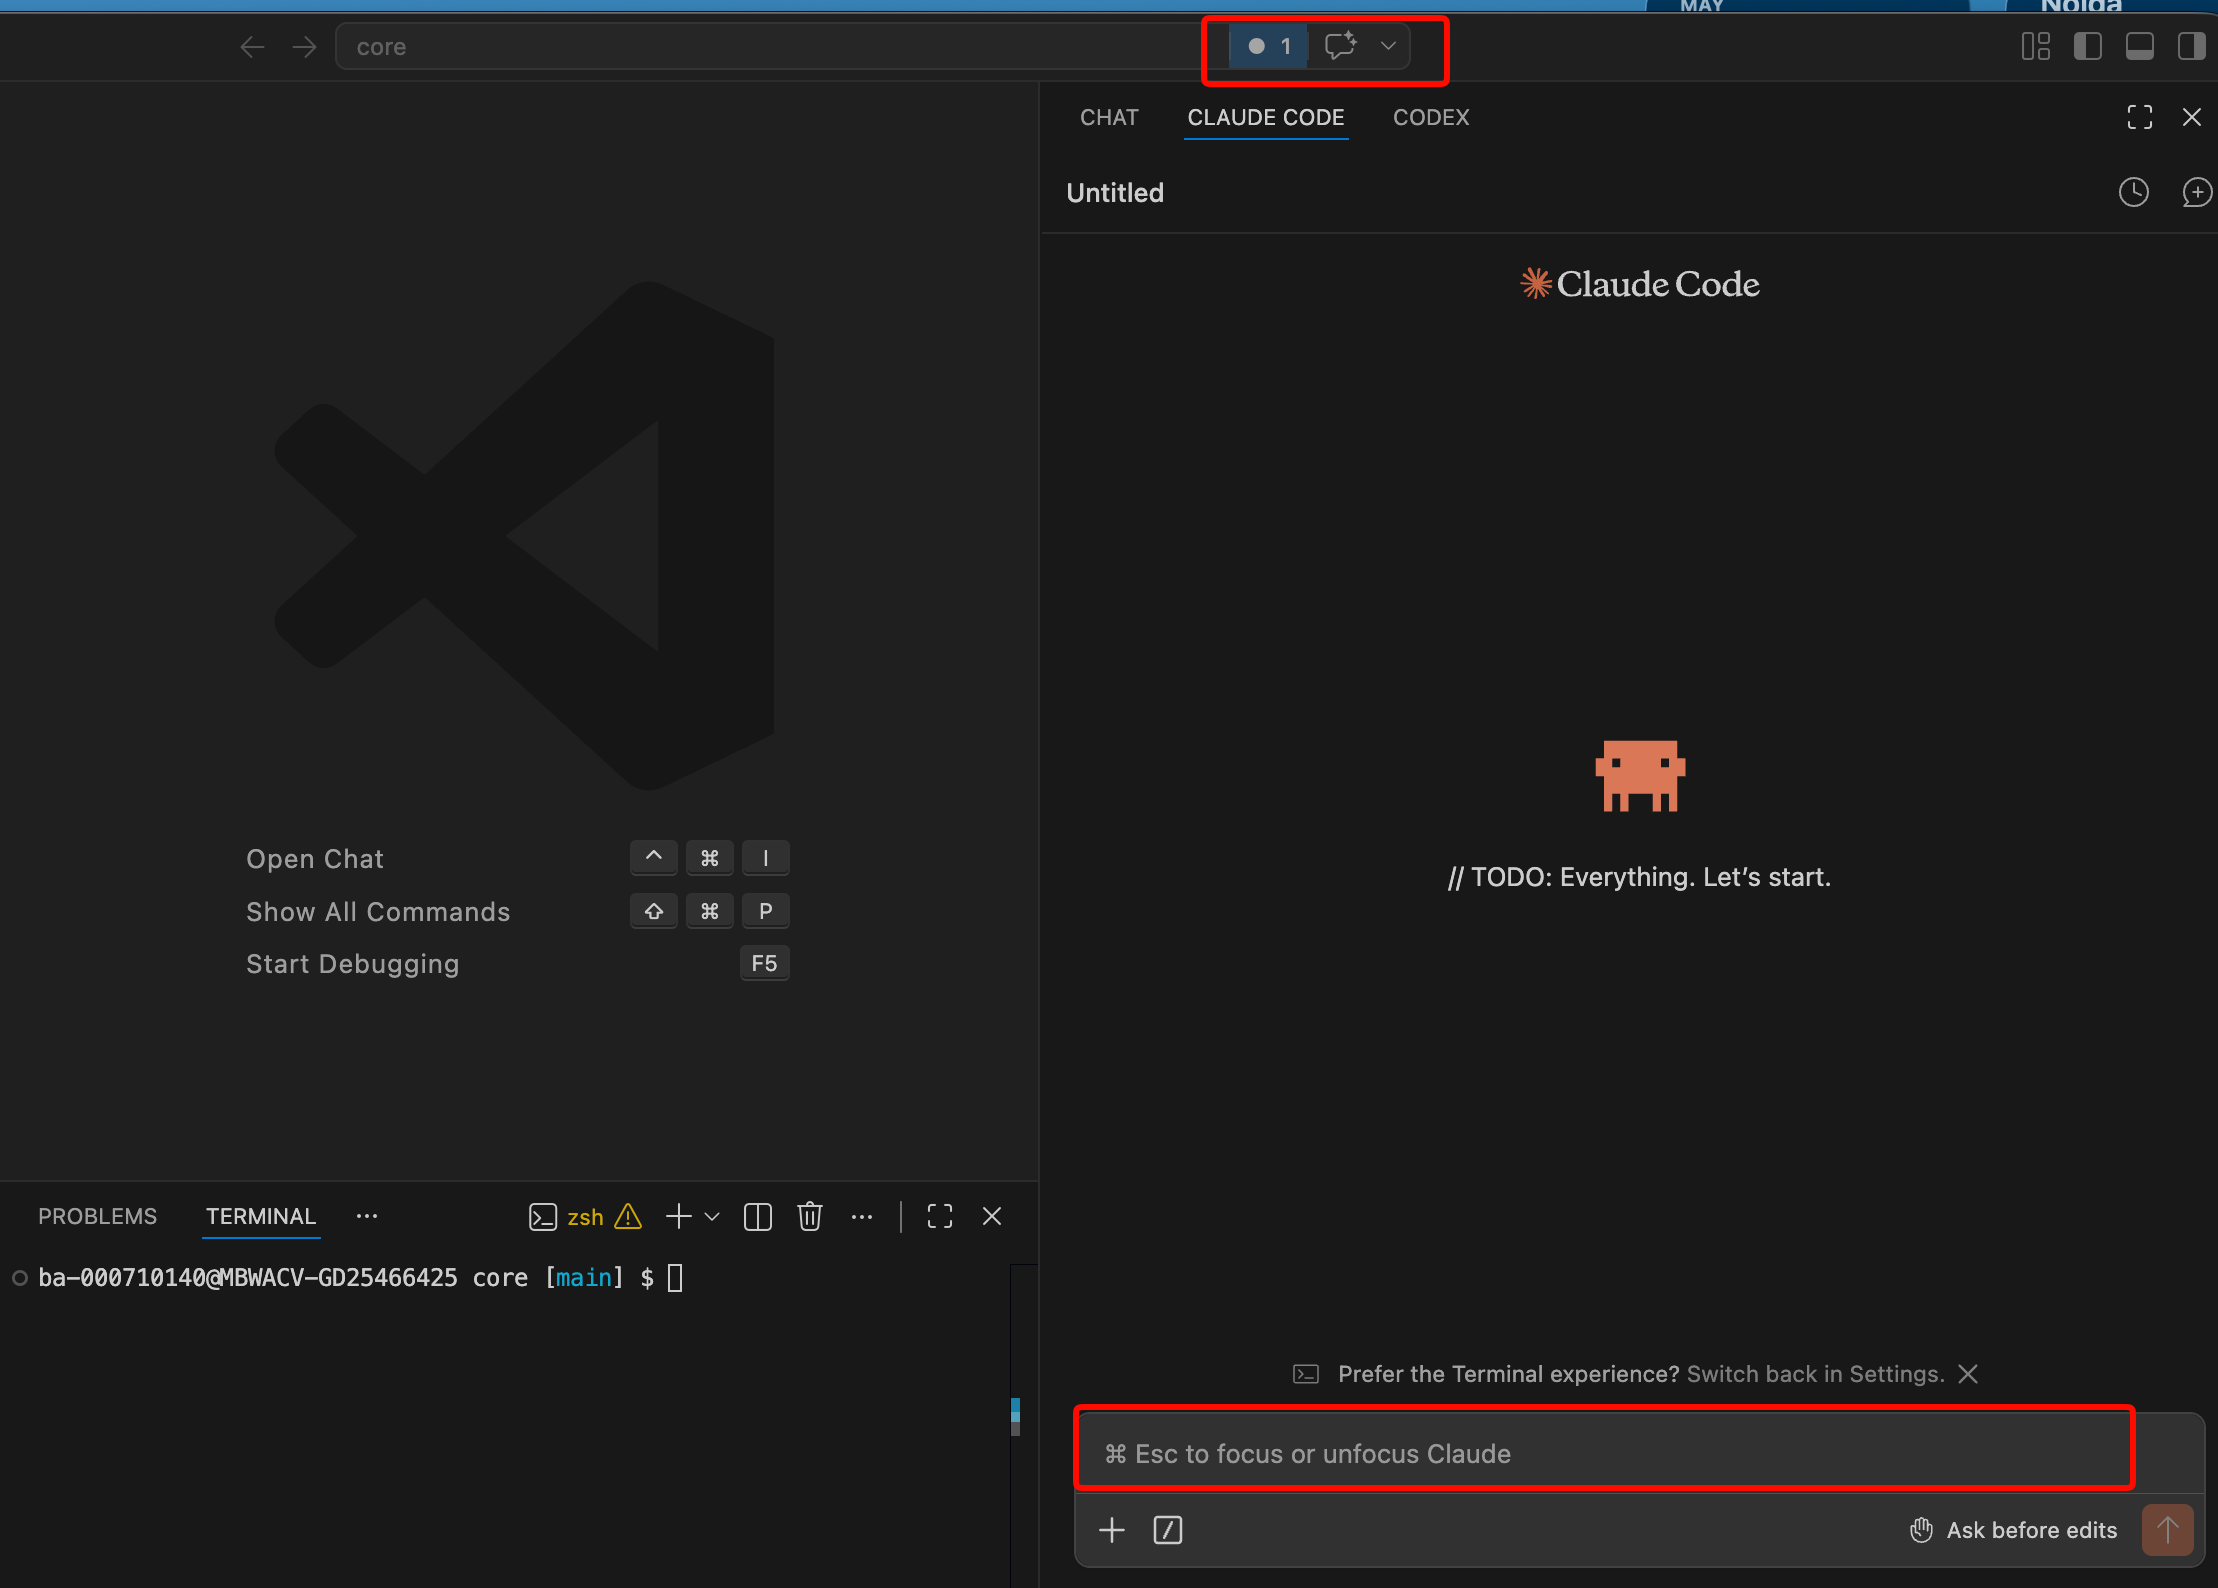
- Click the chat icon to start using the Claude Code chat UI.
Tips
- Use the
proxy-toggleextension to switch between VPN proxy settings and non-VPN settings.
Updated 2 days ago