
Organizing Scenarios with Folders
The Folders feature allows Admin and Manager users to organize scenarios within the Scenario Management page. This improves organization, discoverability, and scalability, making it easier to manage and assign scenarios as the content library grows.
Accessing Folders
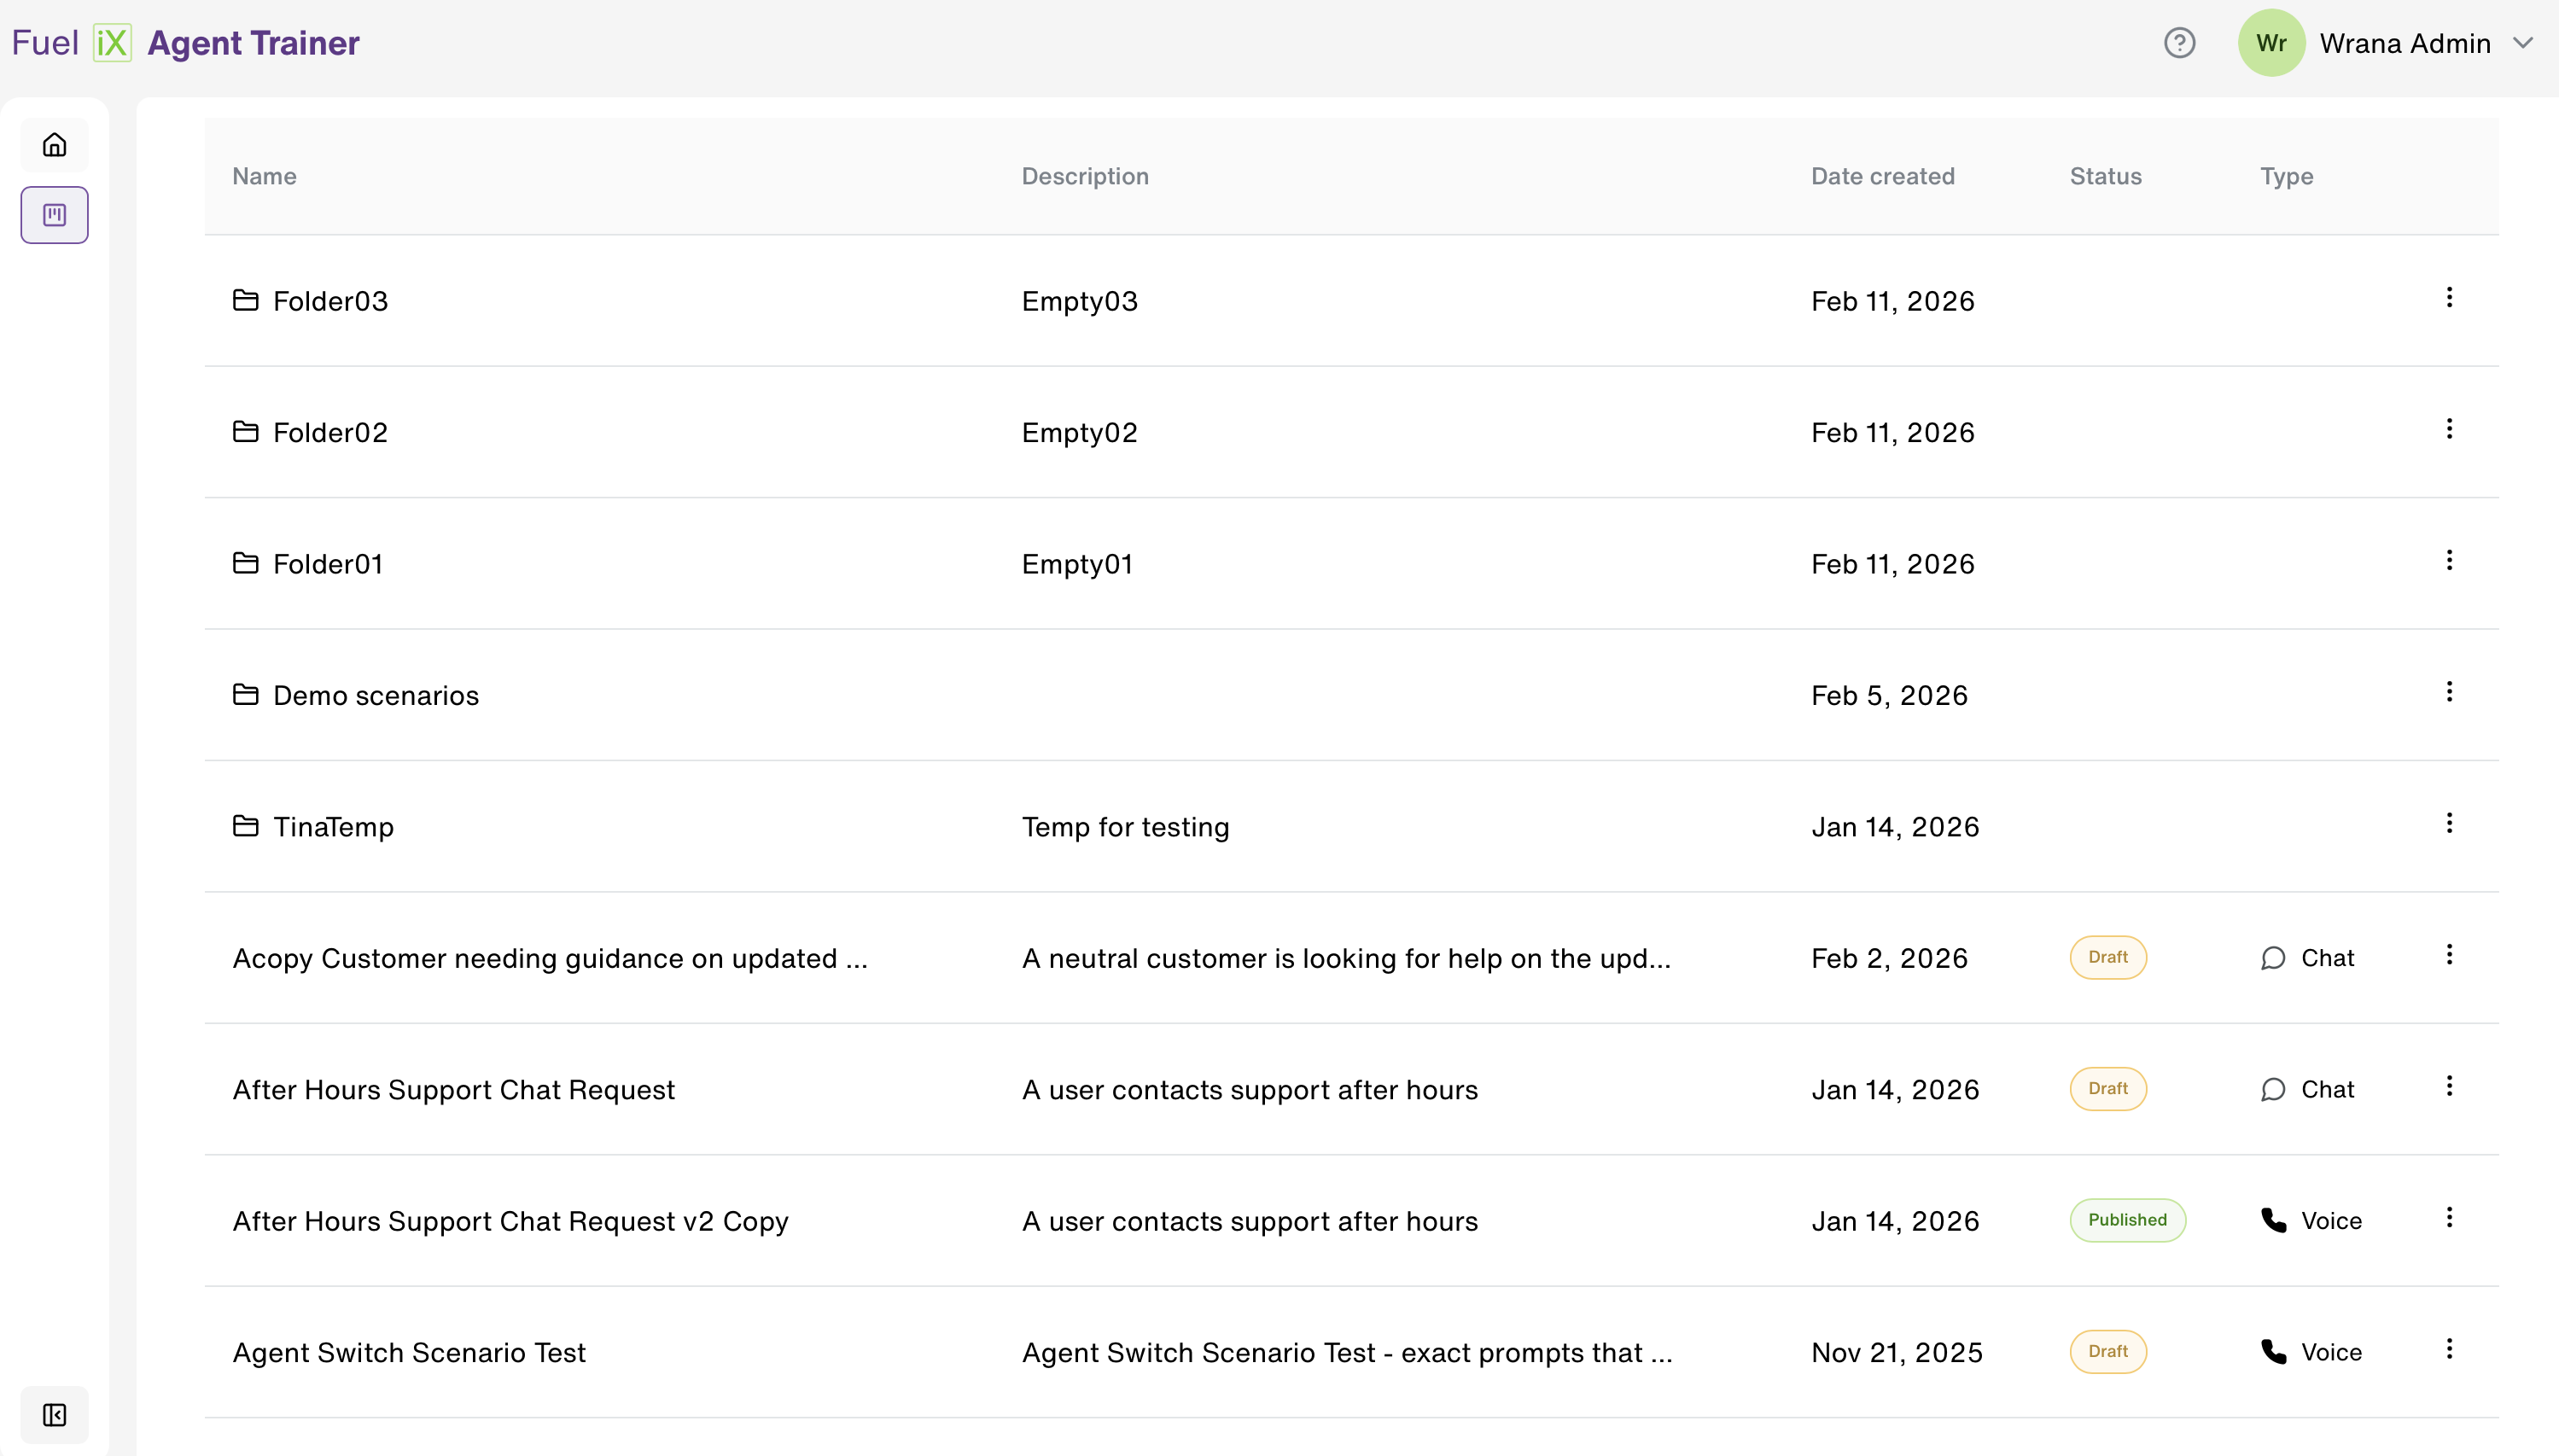
To view folders:
- Go to Scenario Management.
- Folders are displayed at the top of the page.
- Scenarios that are not assigned to any folder are listed below the folders in the same view.
- Unassigned scenarios remain fully accessible and can be managed the same way as any other scenario.
Creating a Folder
To create a new folder:
- Go to Scenario Management.
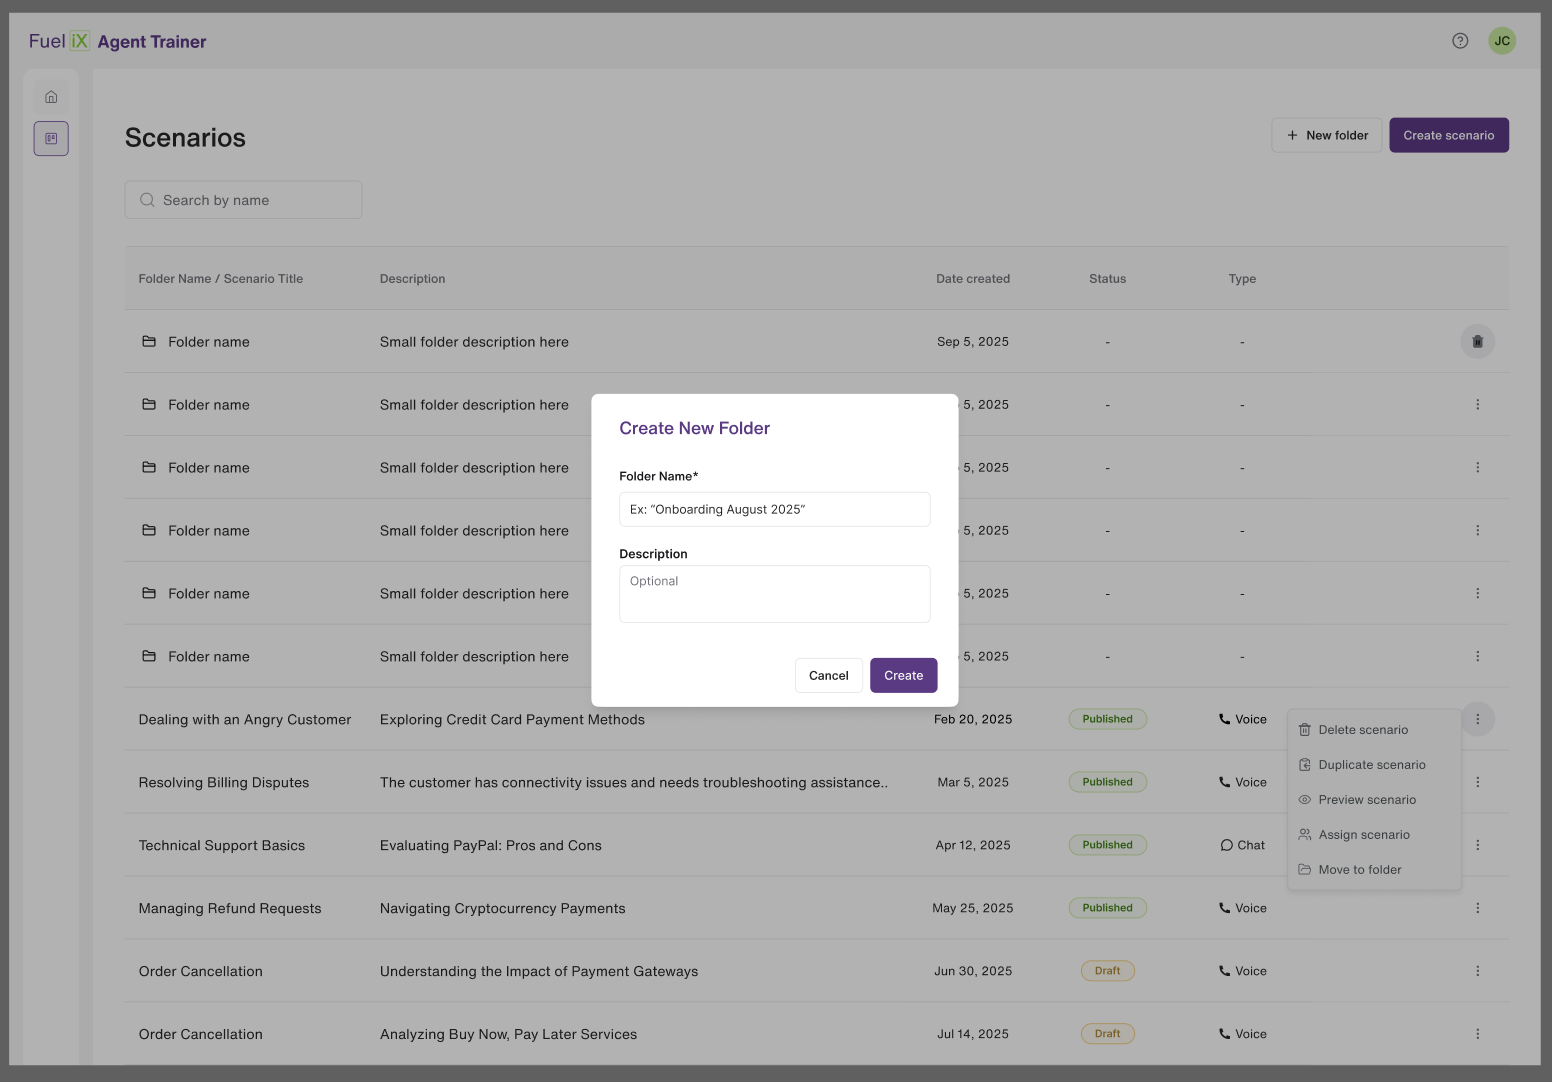
- Click the New Folder button in the top-right corner.
- A 2-step modal will open.
- Modal Step 1 – Folder details
:
- Folder name (required, must be unique, up to 50 characters)
- Description (optional, up to 500 characters)
- Step 2 – Assign scenarios to the new folder:
- Adding scenarios while creating a folder is optional. You can click the "Skip for now" button and add scenarios later
- Use the search bar to find scenarios by name
- Click the checkboxes to select multiple scenarios at once
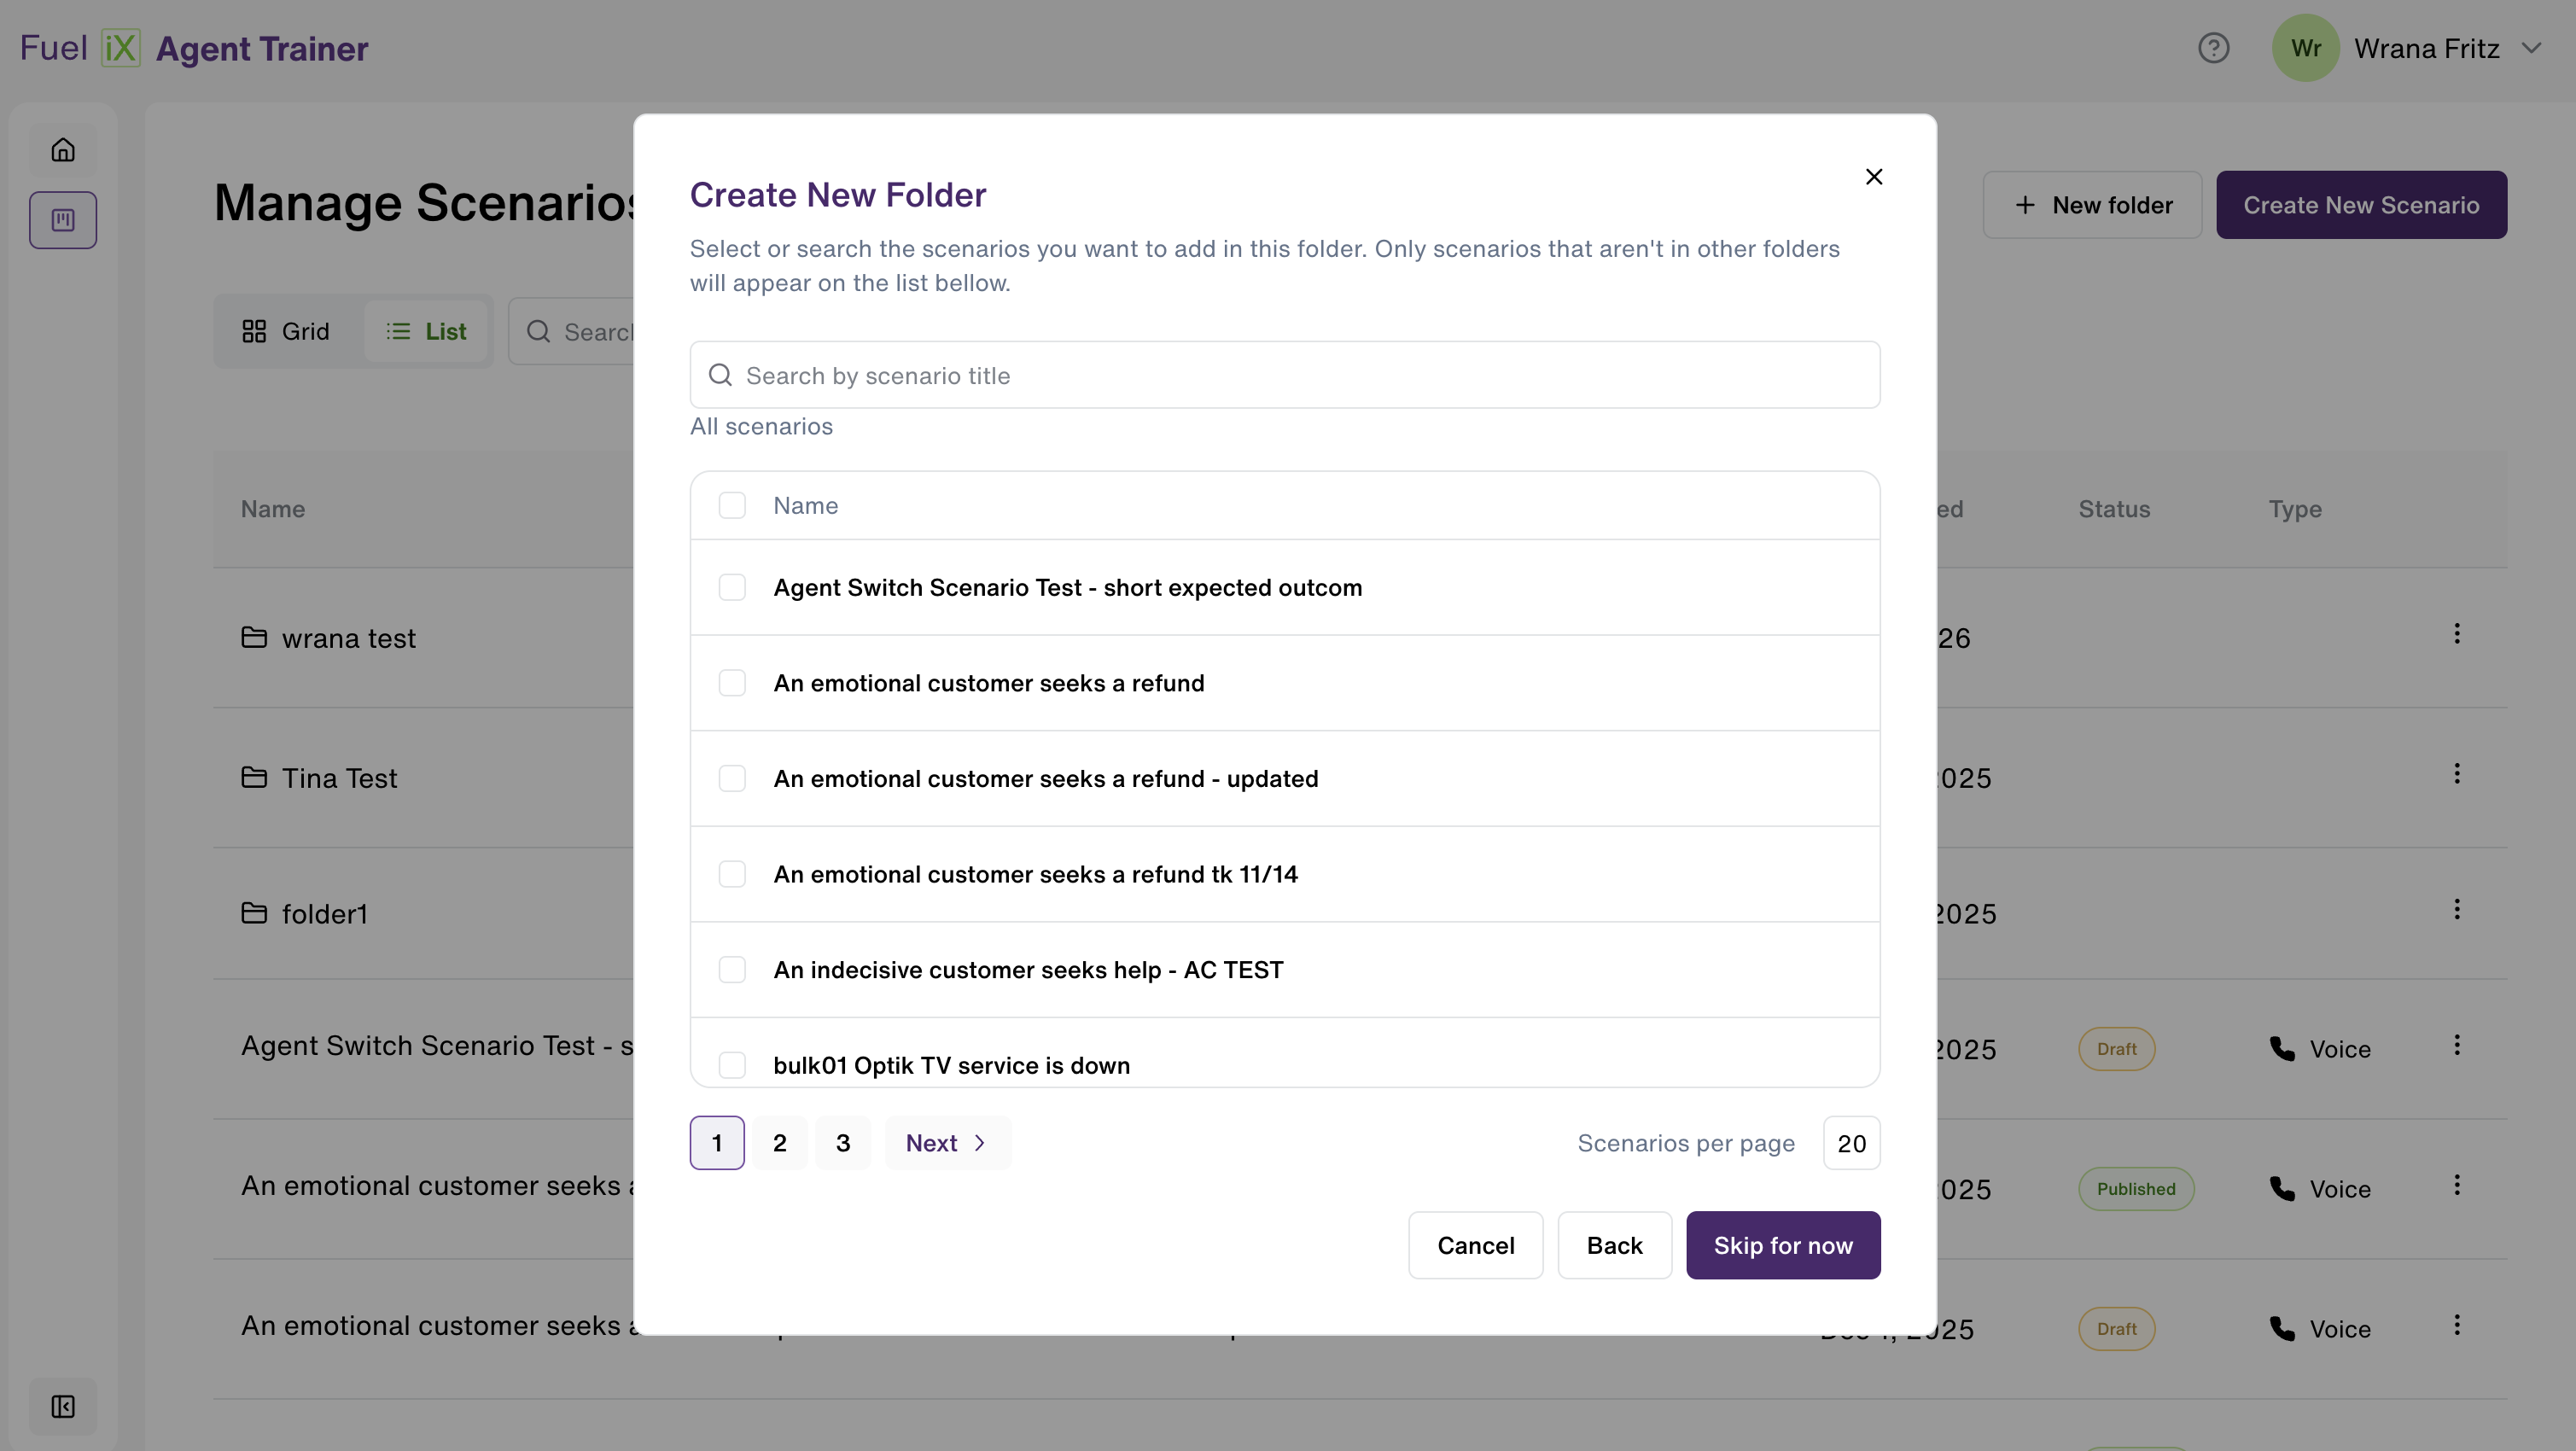
- After selecting at least one scenario, the "Skip for now" button will become Save button.
- Click on the Save button
The new folder will appear at the top on the Scenario Management page.
Adding Scenarios to a Folder
From the Scenario Management Page
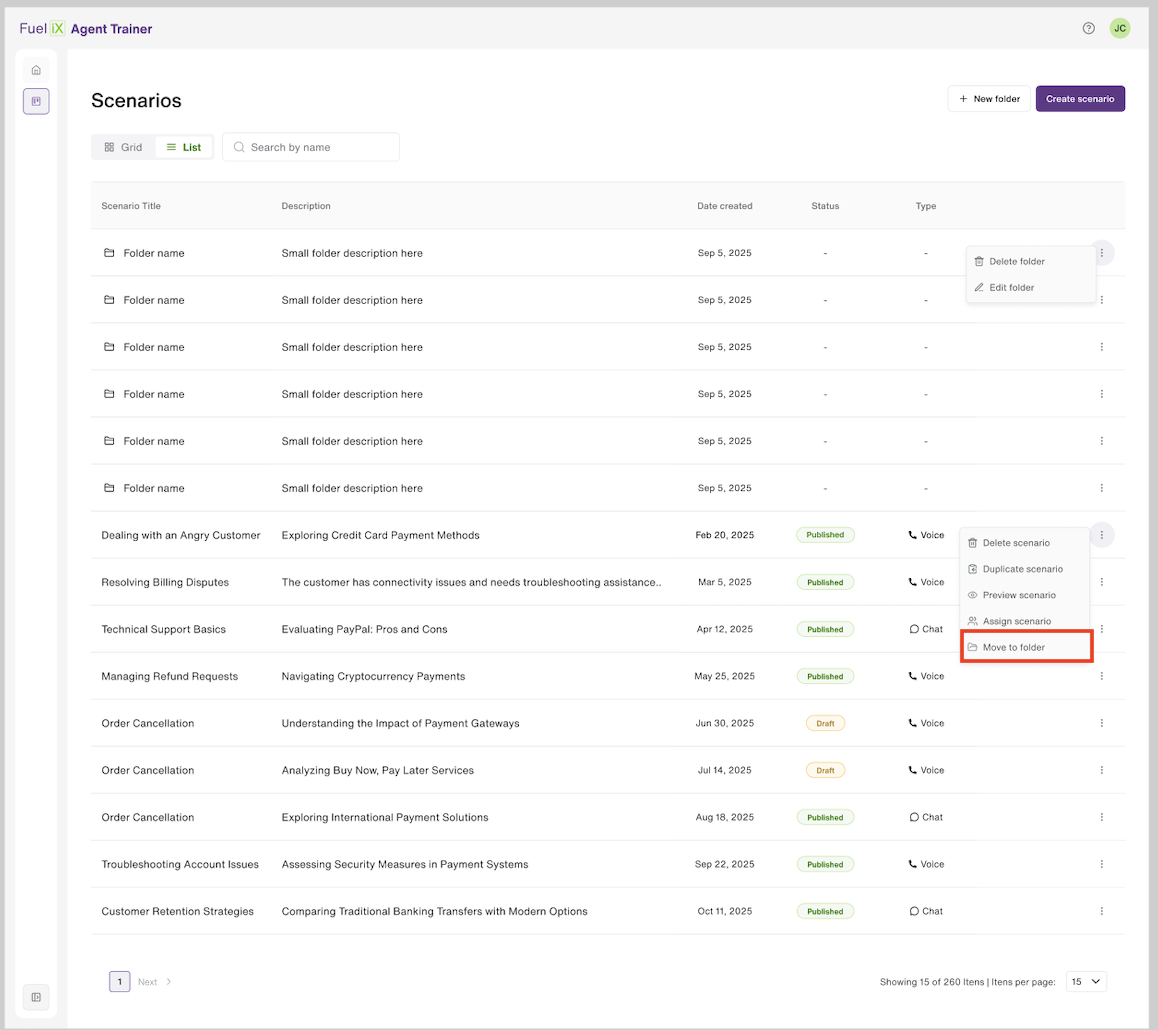
To move a scenario into a folder:
- Find the specific scenario in the Scenario Management list.
- Click the three-dot menu (⋮) next to the scenario.
- Select Move to folder.
- Choose the destination folder.
⚠️ Important:
A scenario can belong to only one folder at a time.
- Choose the destination folder.
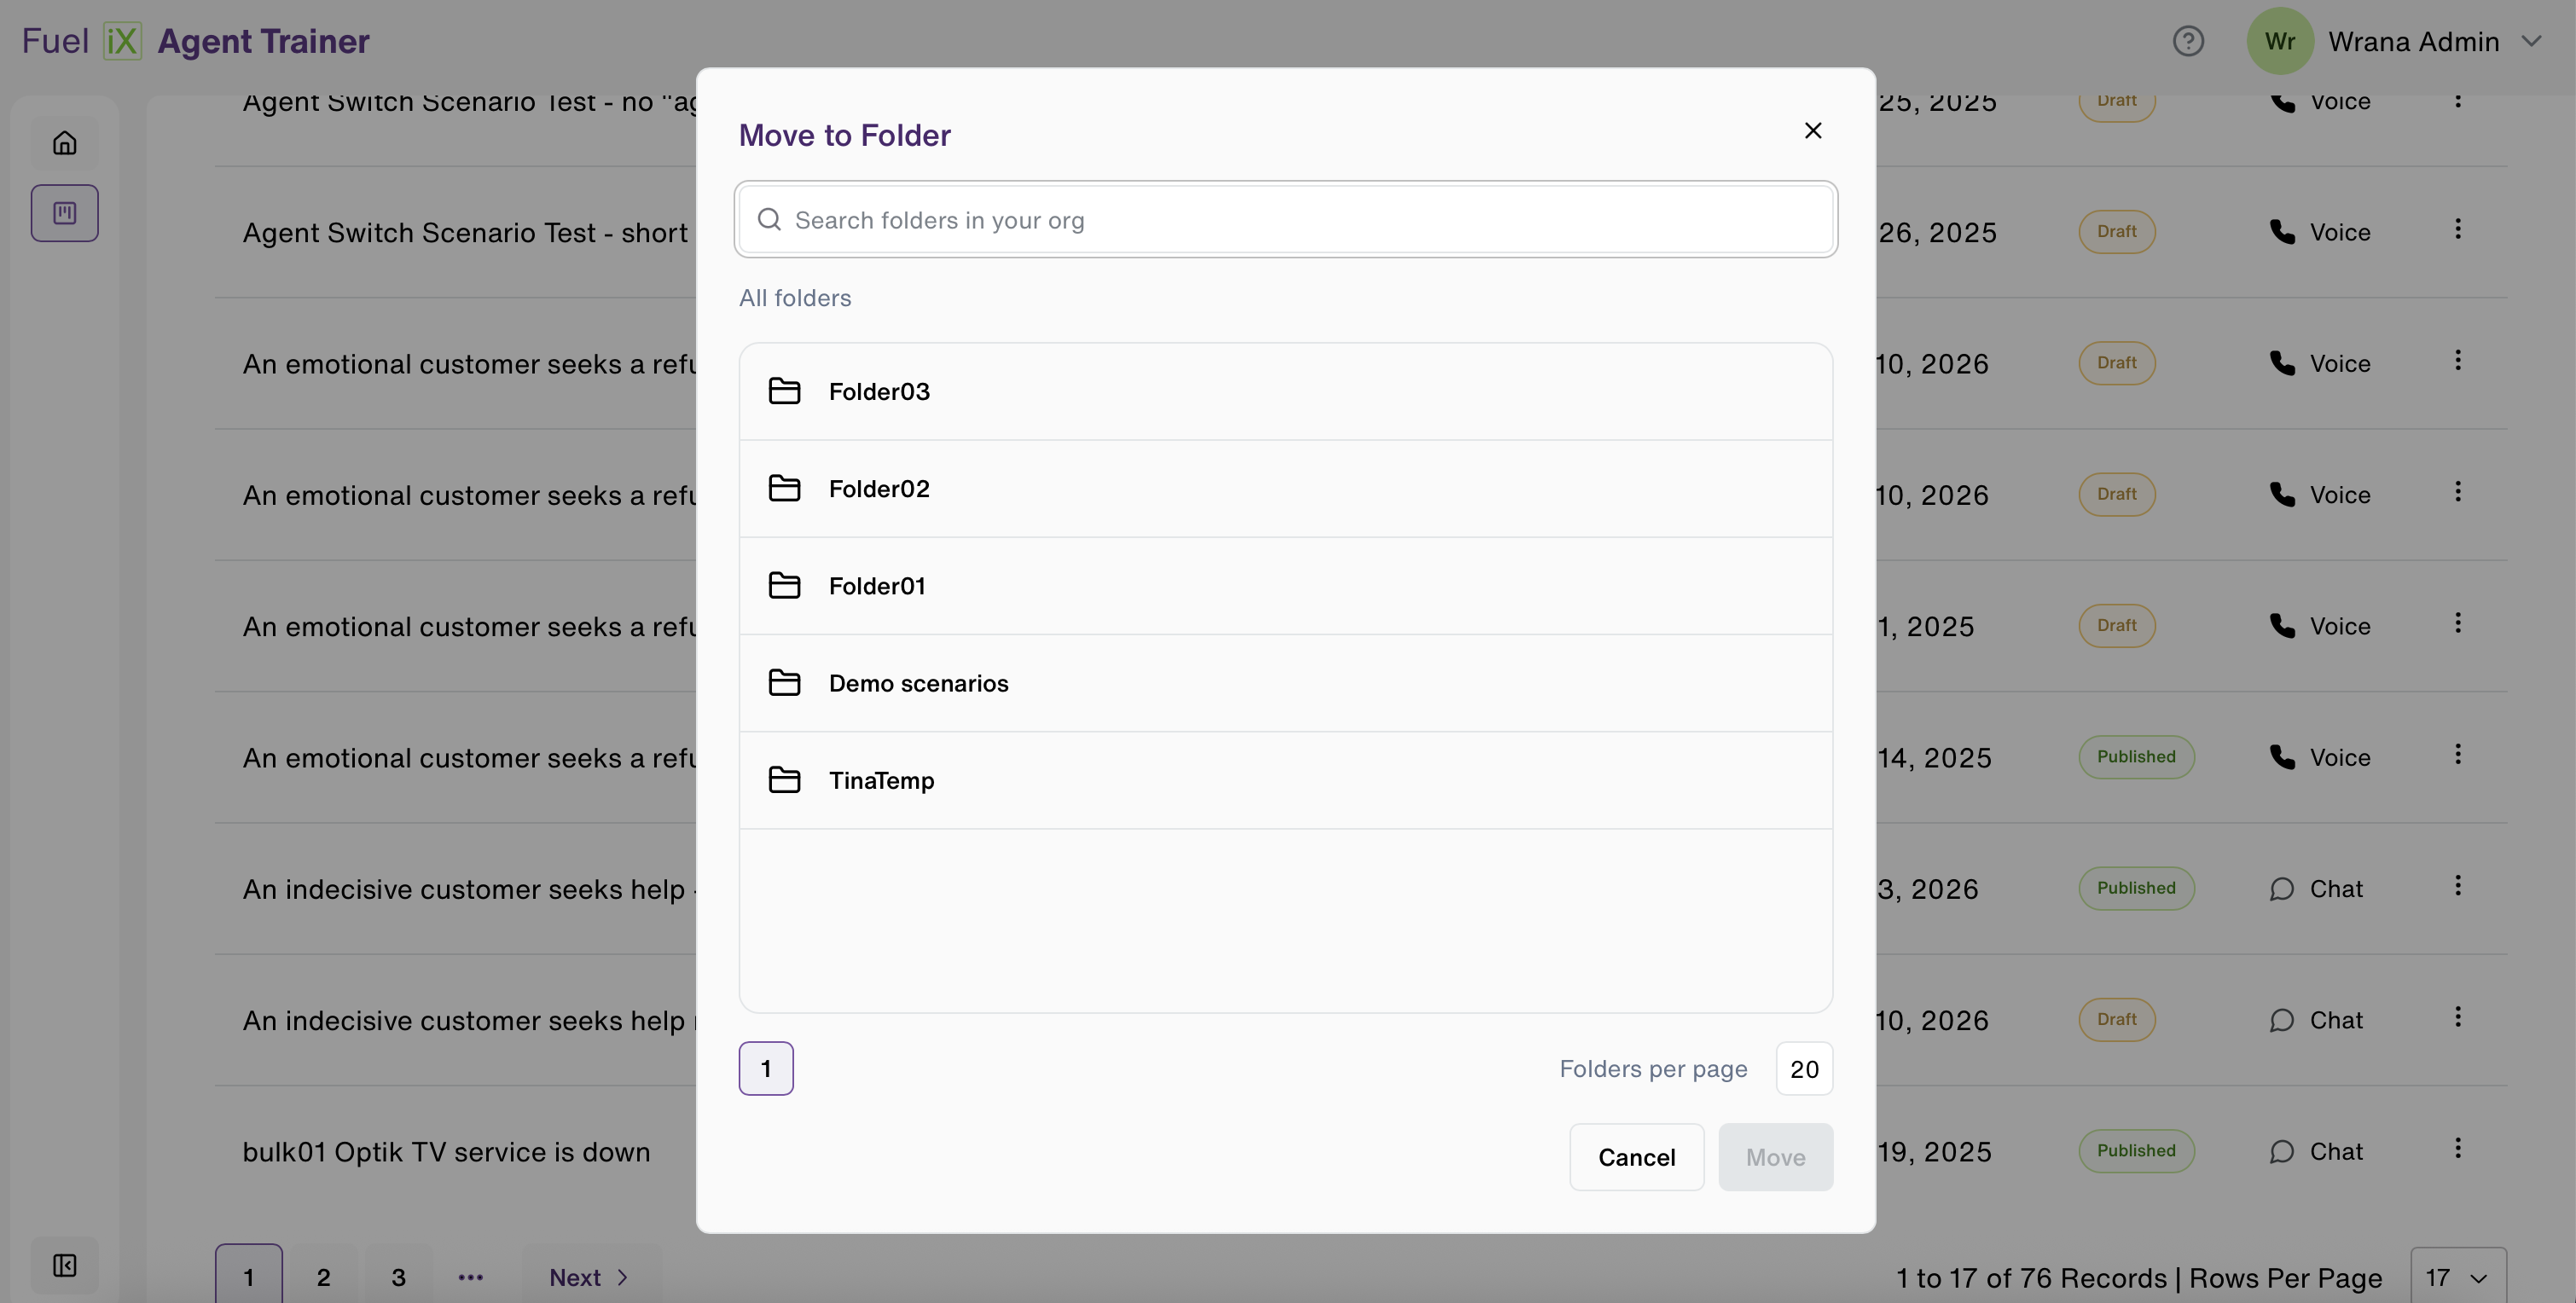
- The selected scenario will disappear from the scenario management page
⚠️ Important:
A scenario can belong to only one folder at a time.
Managing a Folder
Click in the folder name to open its contents.
Inside a folder, in the top-right corner, an Edit button is available.
When clicking Edit, a 2-step modal will open (same as the Create Scenario flow), allowing users to:
Step 1:
- Change the folder name
- Change the folder description
Step 2:
- Add new scenarios to the folder
- Remove scenarios currently assigned to the folder
When a folder is empty, an Add Scenario button appears in the center of the screen.
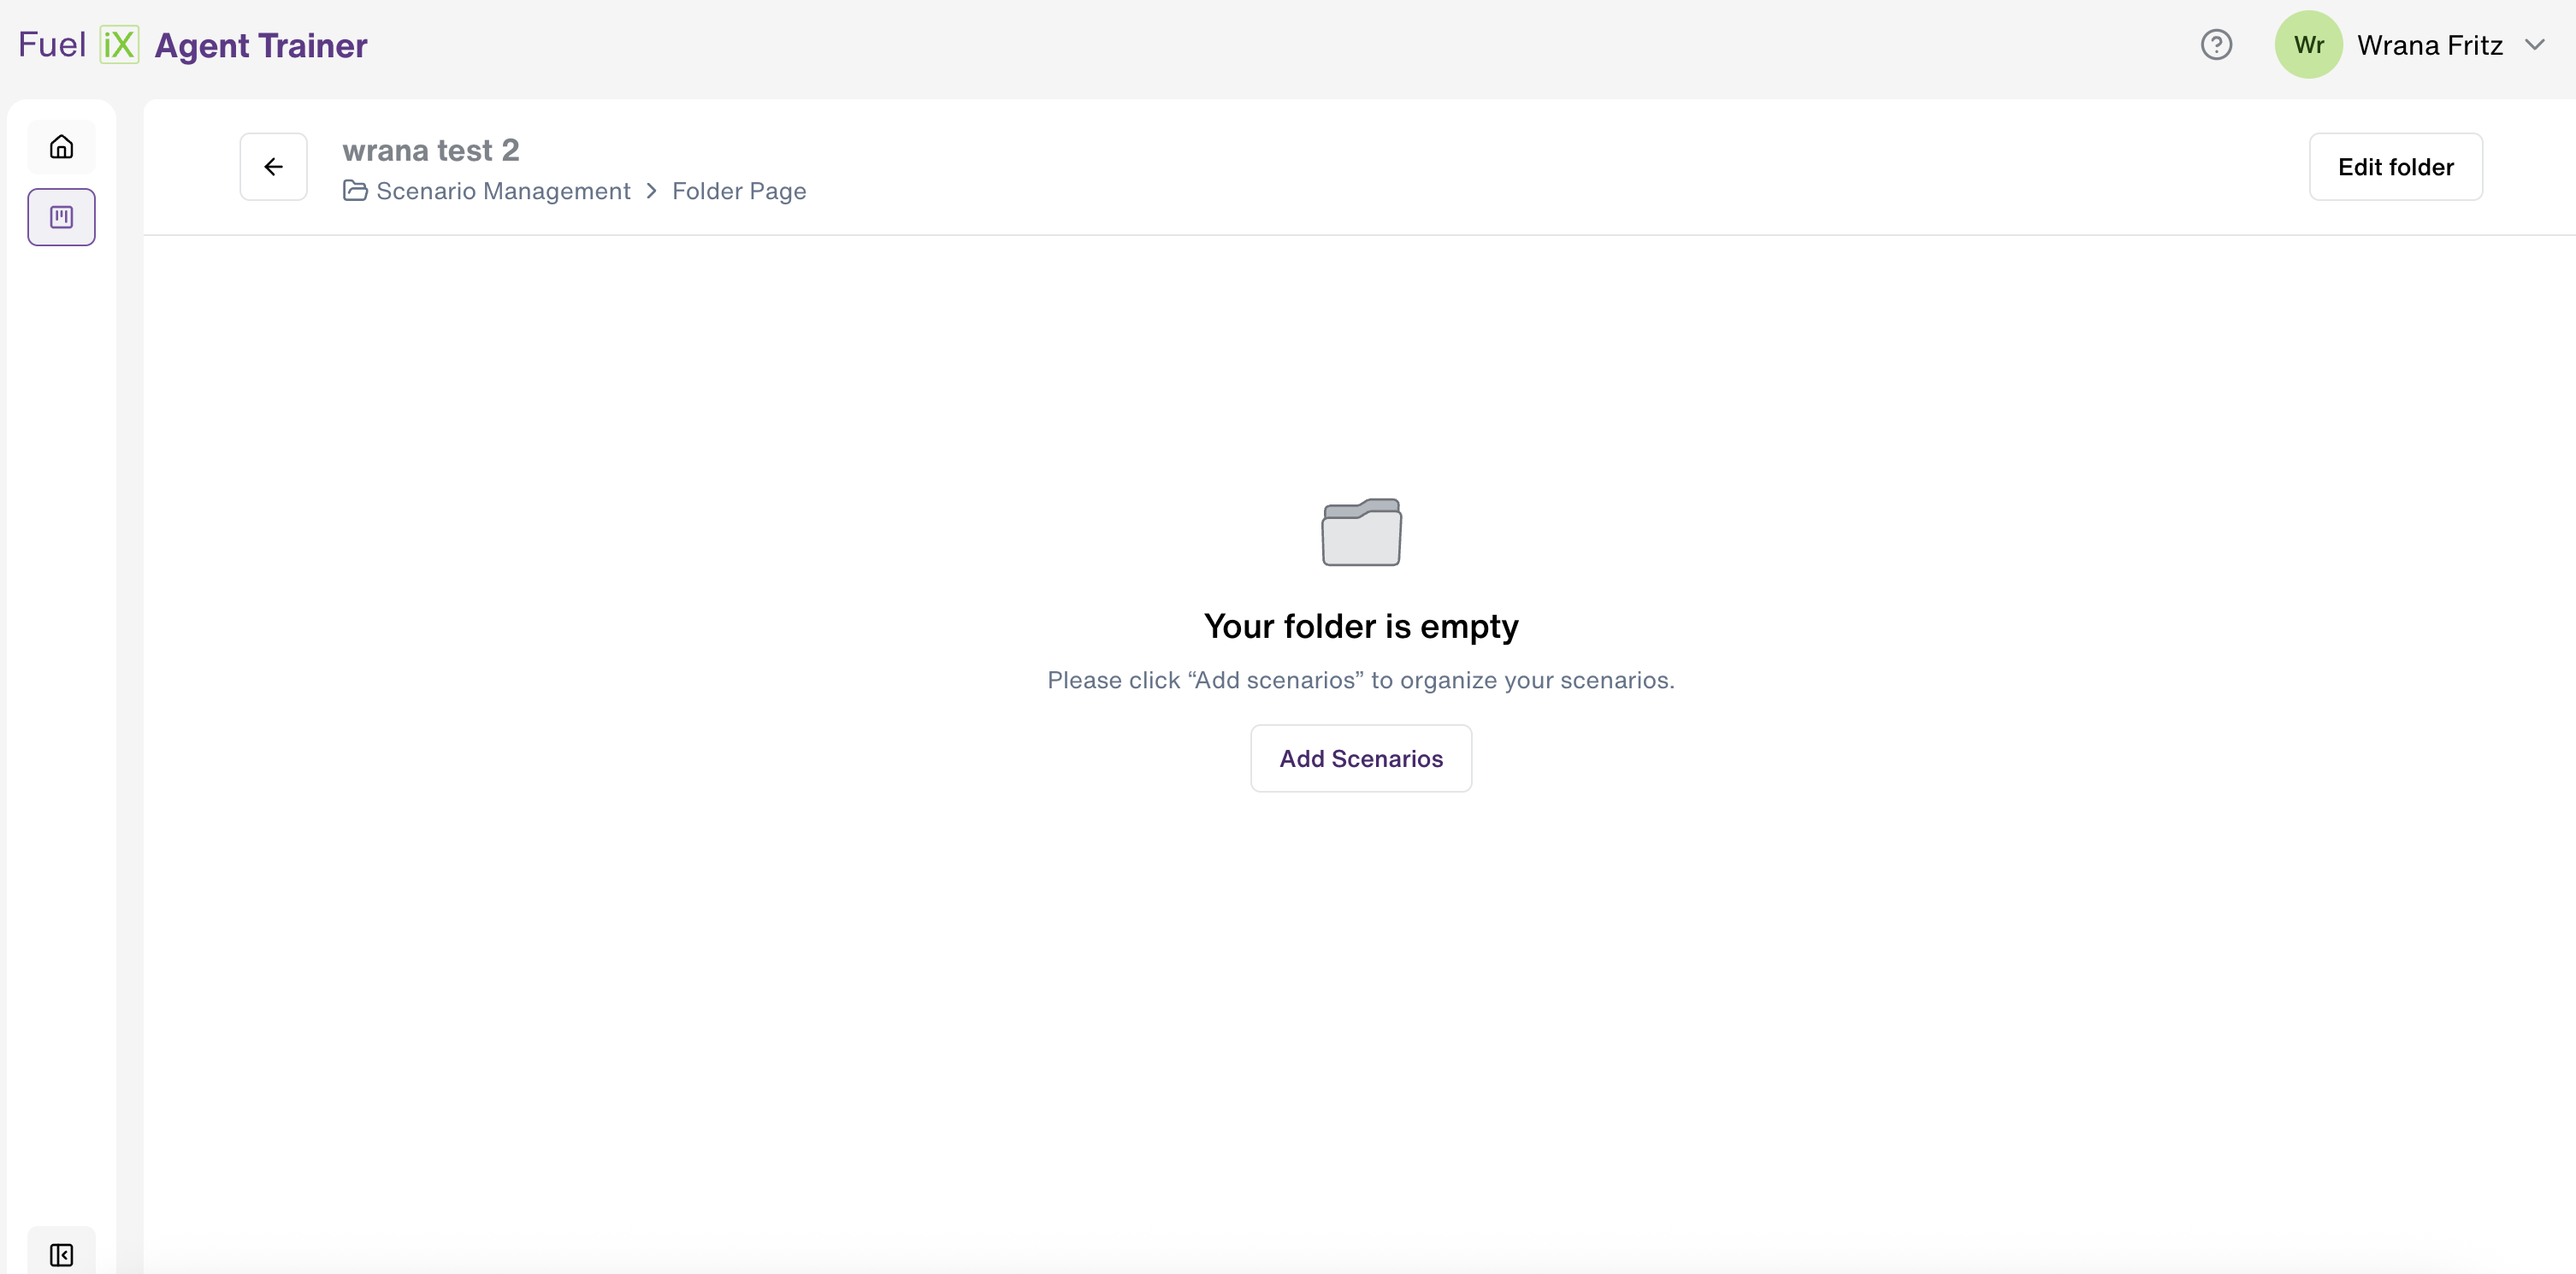
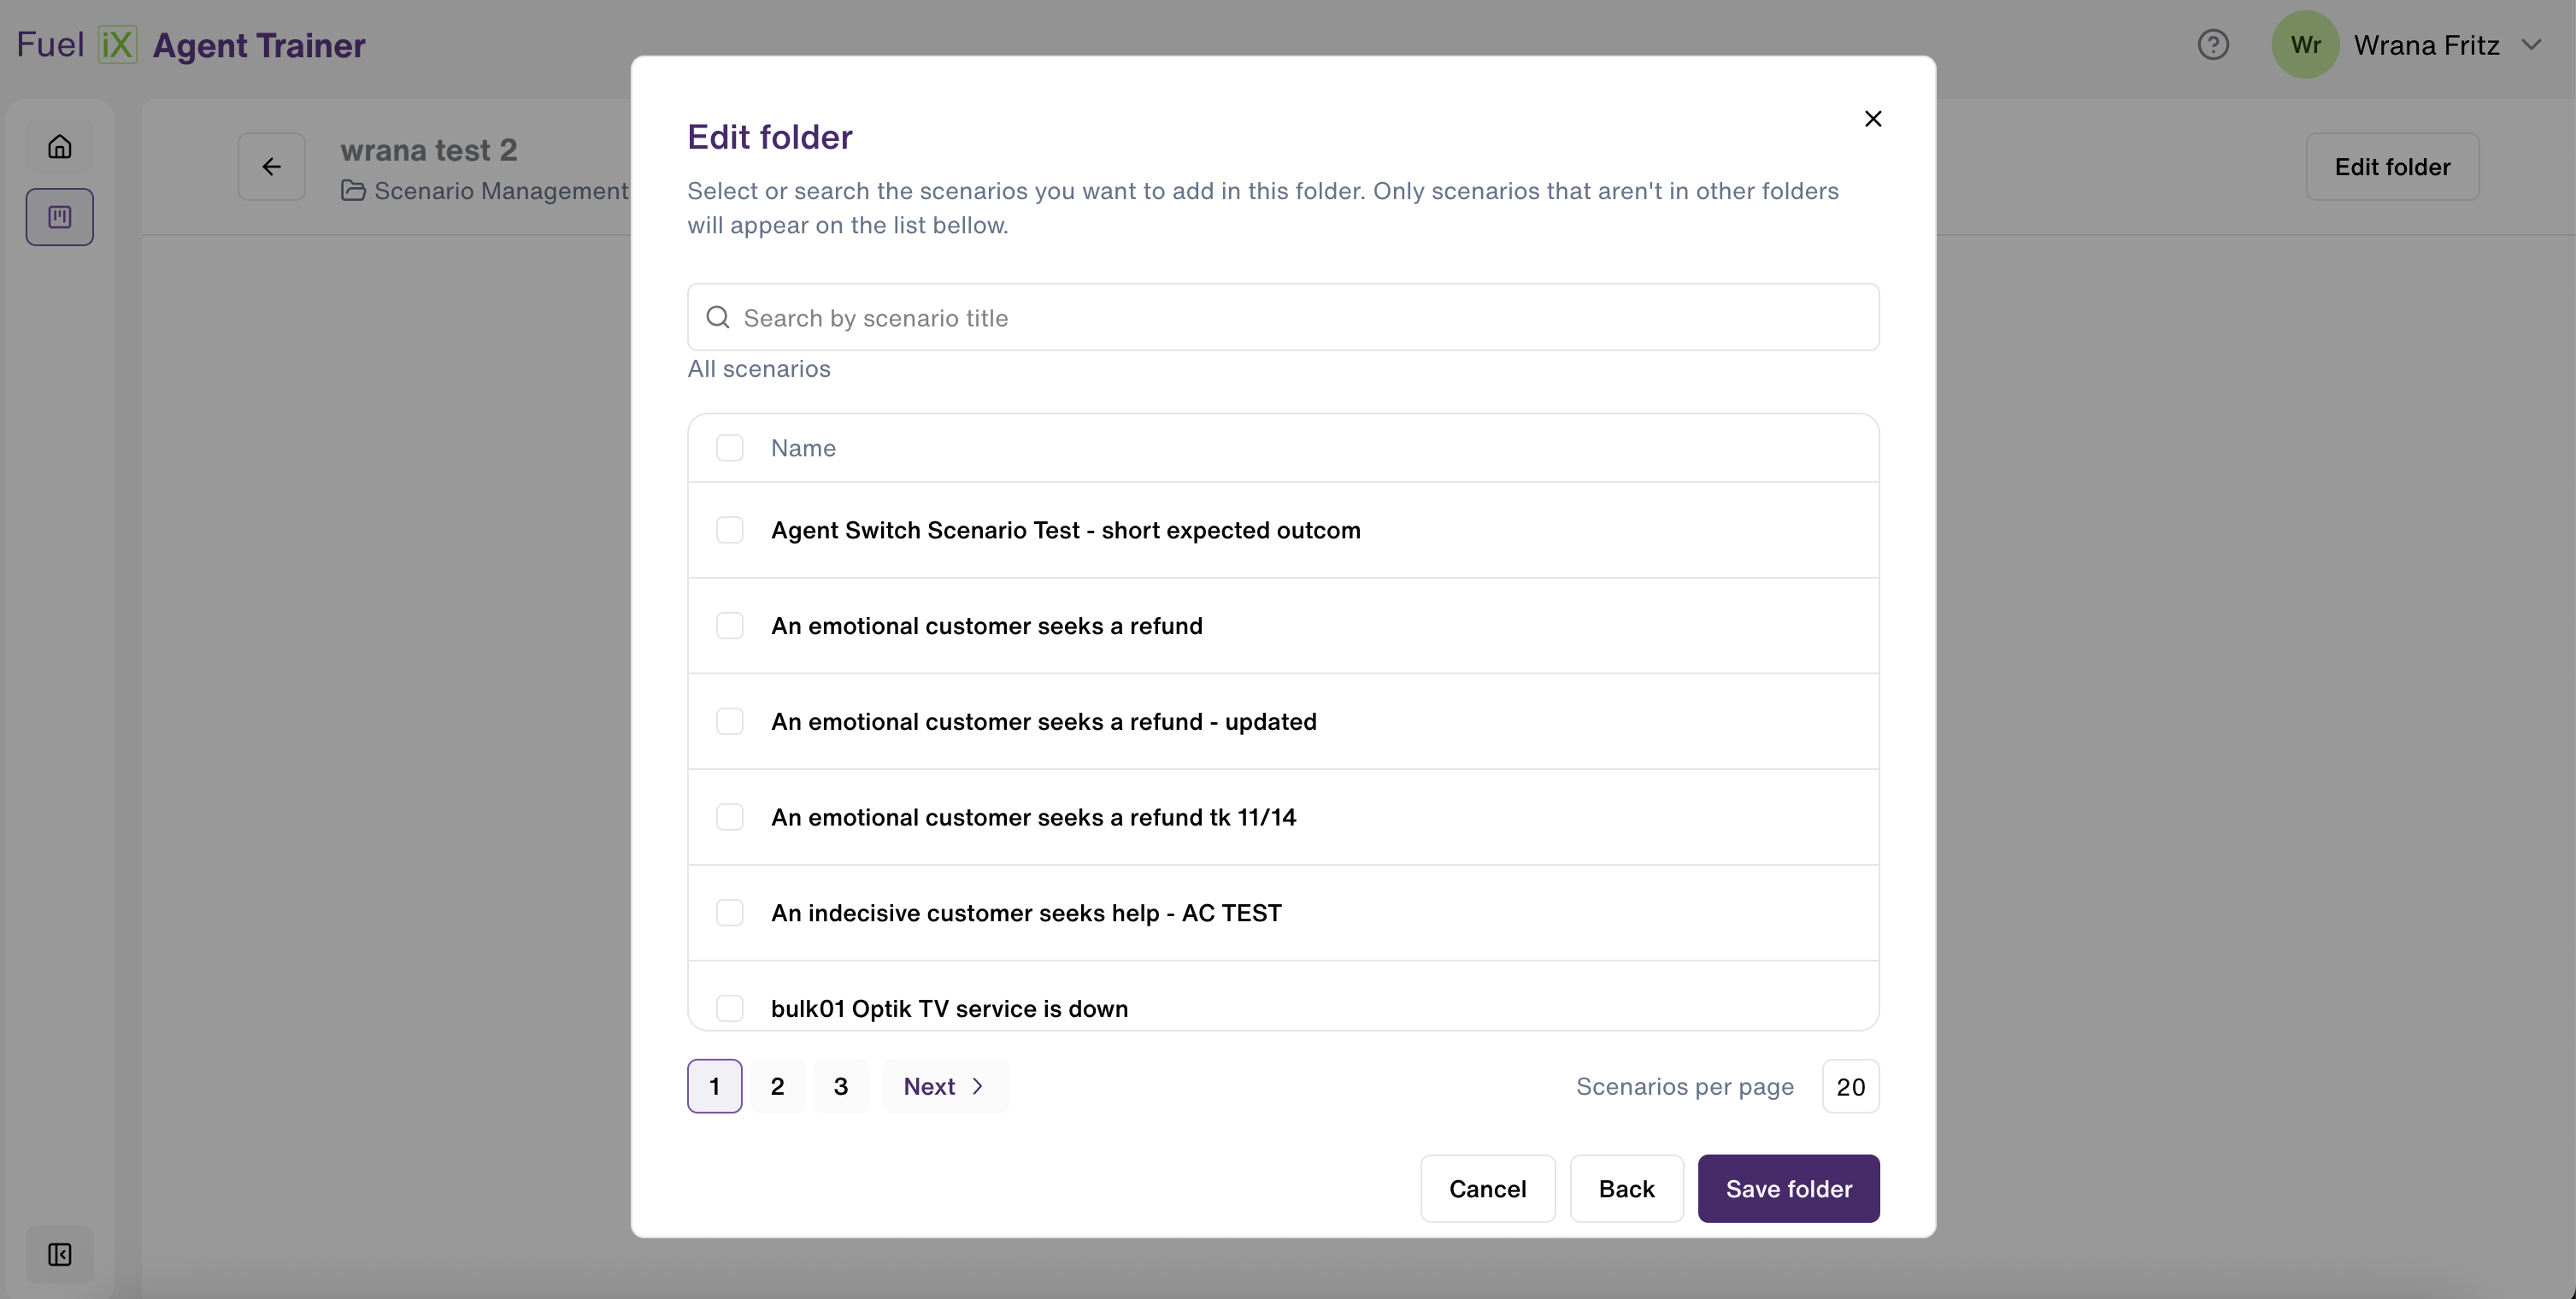
When the user clicks it, a modal opens where they can:
- Use the search bar to find scenarios by name
- Select multiple scenarios at once
- Use bulk actions to assign all available scenarios (scenarios not currently inside a folder)
Scenario Actions Inside a Folder
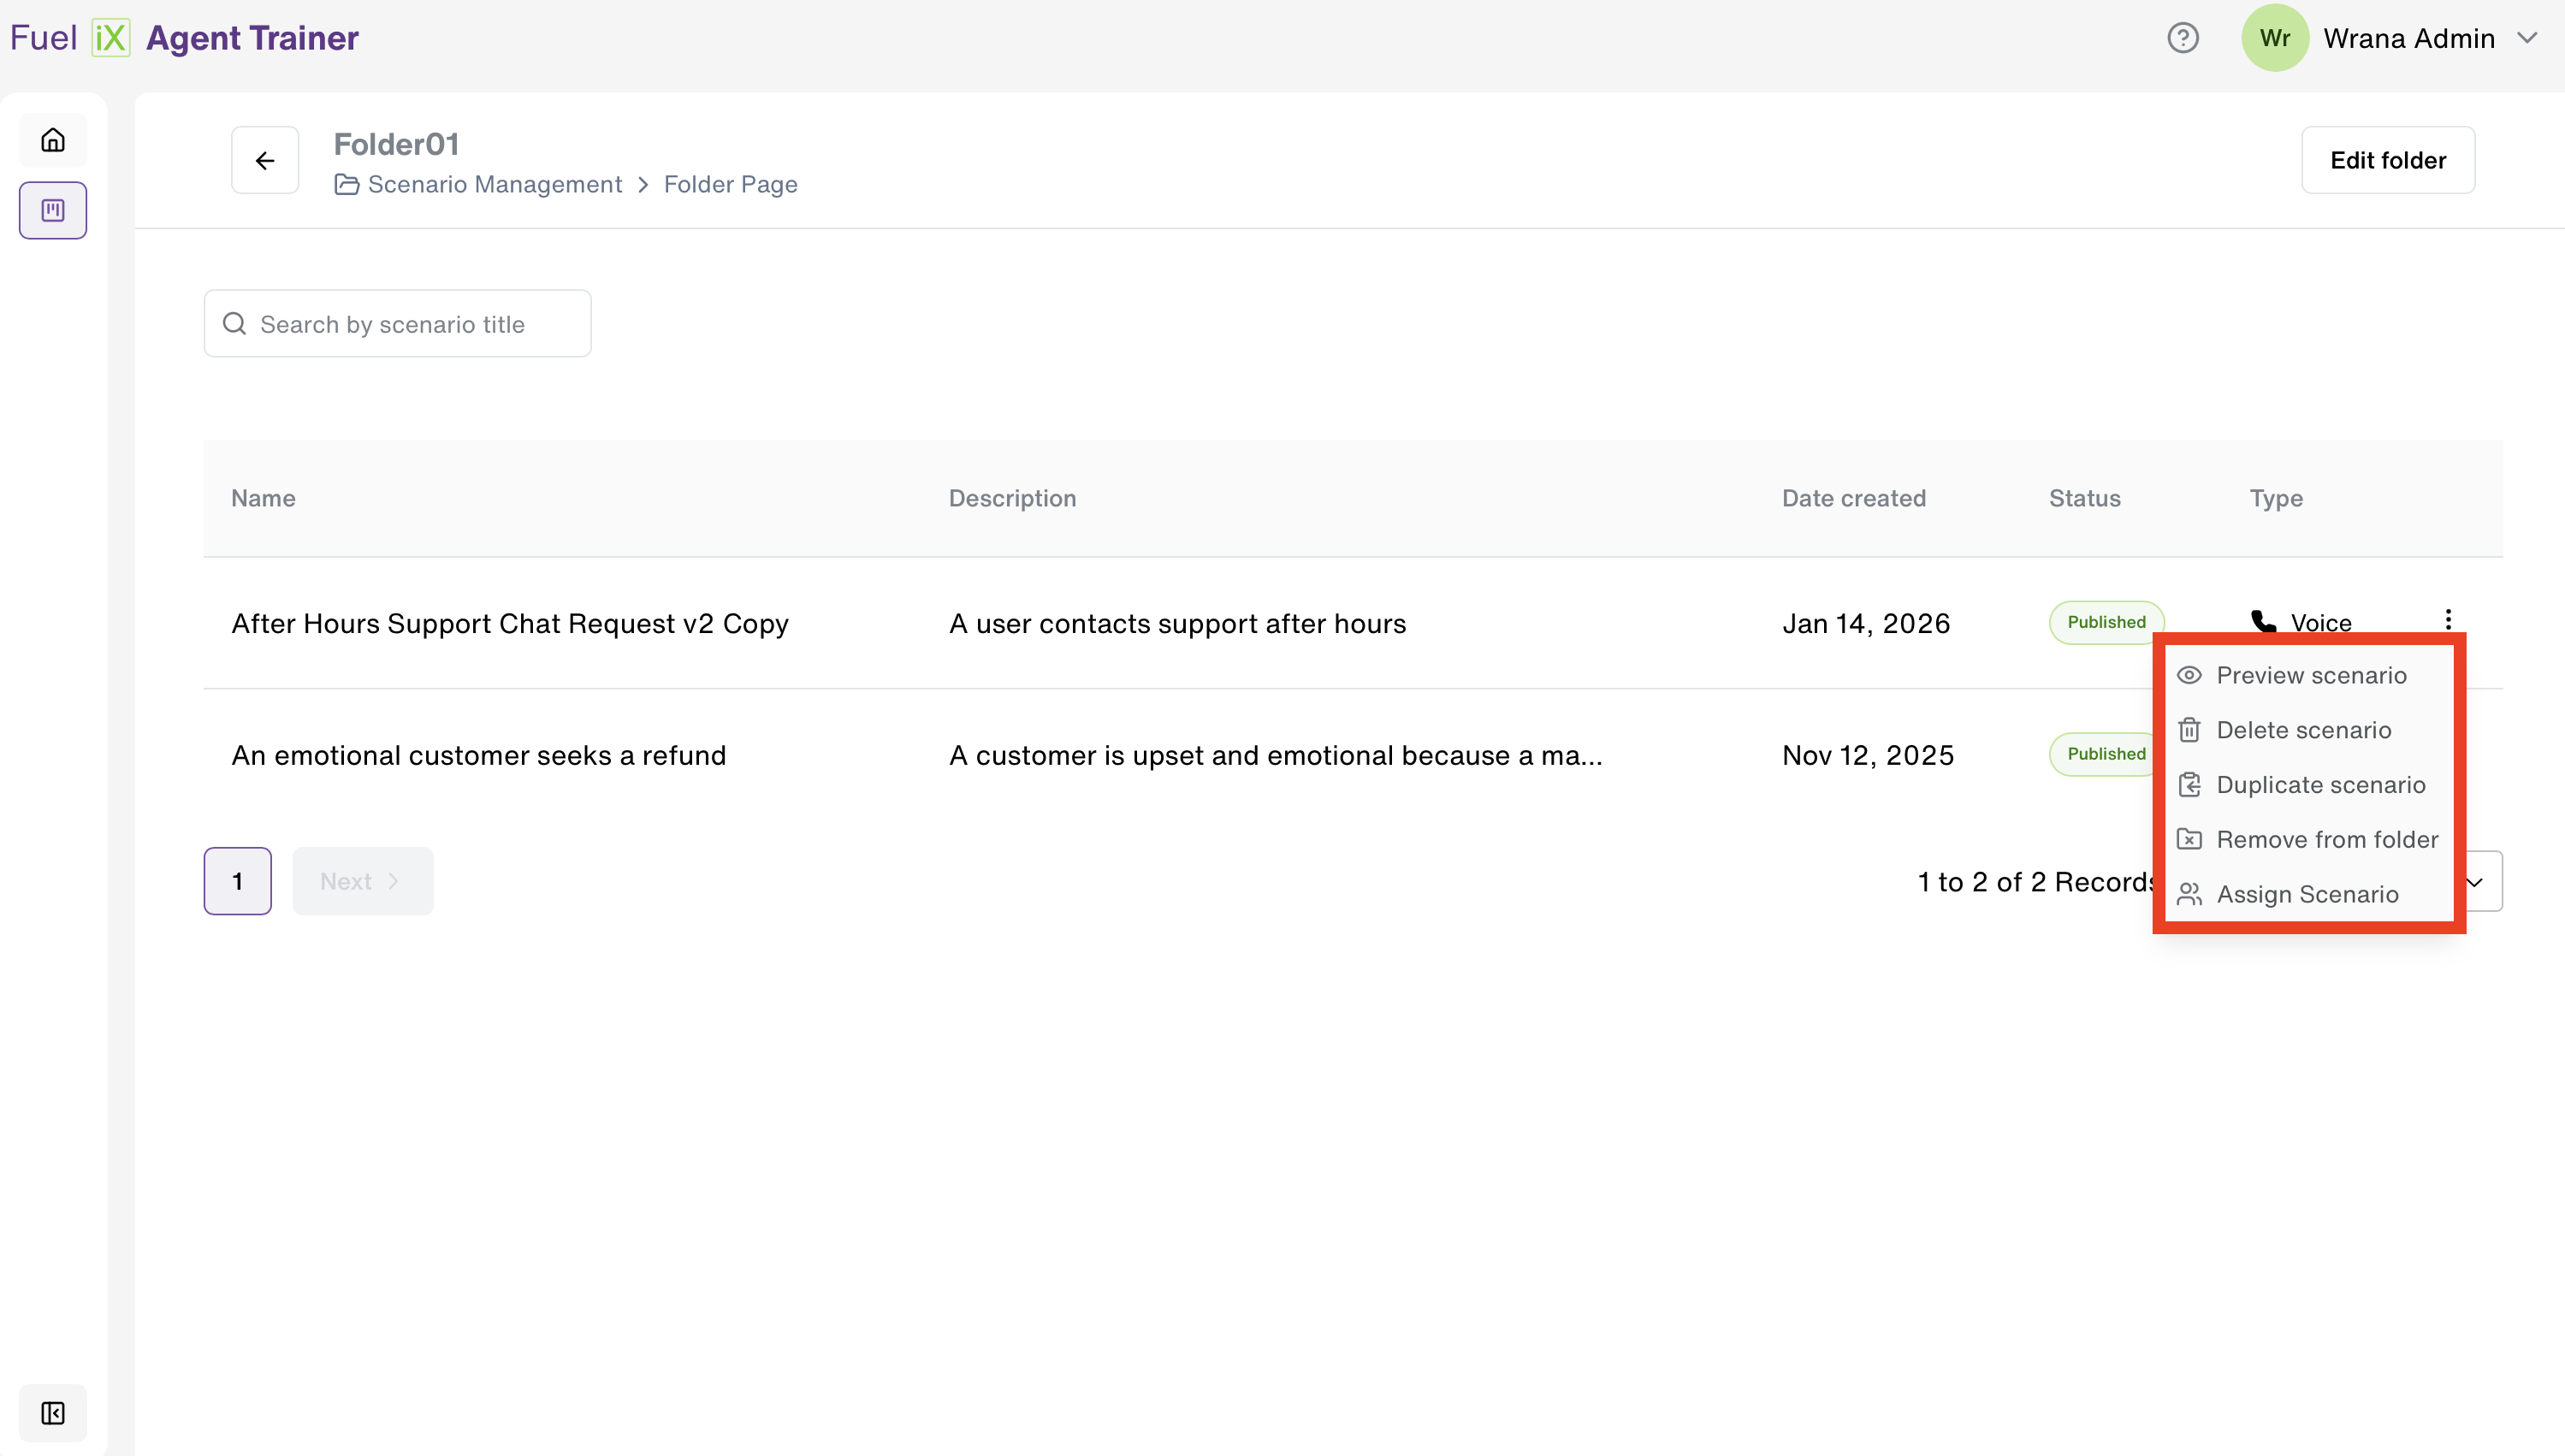
Each scenario within a folder includes a three-dot menu (⋮) with the following options:
Preview the Scenario
- Can preview how the scenario will work.
Delete scenario
- Permanently deletes the scenario.
- This action cannot be undone.
Duplicate scenario
- Creates a copy of the selected scenario.
- If the original scenario is inside a folder, the duplicated scenario is added to the same folder.
Remove from folder
- Removes the scenario from the folder. It will then appear on the Scenario Management page along with all other scenarios that are not assigned to any folder.
Assign scenario
- Assigns the scenario to specific agents.
- Click here to see more details about this functionally
Updated 6 months ago