
User Guide: Admin Settings
1. Overview
The Admin Settings page in the Fuel IX Agent Assist platform is a centralized hub for administrators. It allows you to set up and manage the copilots and features that shape the Agent Assist experience for all users.
From this page, you can control which copilots are available, change their display order, and enable or disable global features for the agent interface.
2. Prerequisites
To access and modify the Admin Settings, your user account must be assigned an Admin role. If you do not have this role, the "Admin Settings" option will not be visible to you.
If you believe you should have access, please contact your system administrator.
3. Accessing the Page
- Log in to the Fuel IX Agent Assist platform.
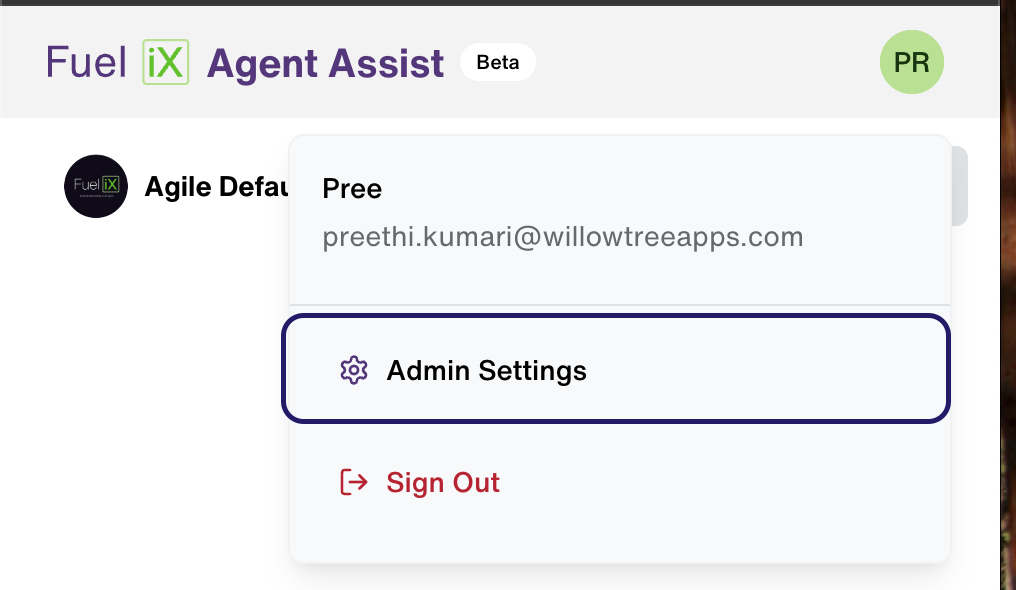
- In the top-right corner of the screen, click on your profile icon (it will show your initials, e.g., "PR").
- A dropdown menu will appear. Click on the Admin Settings option.
4. Navigating the Admin Settings Page
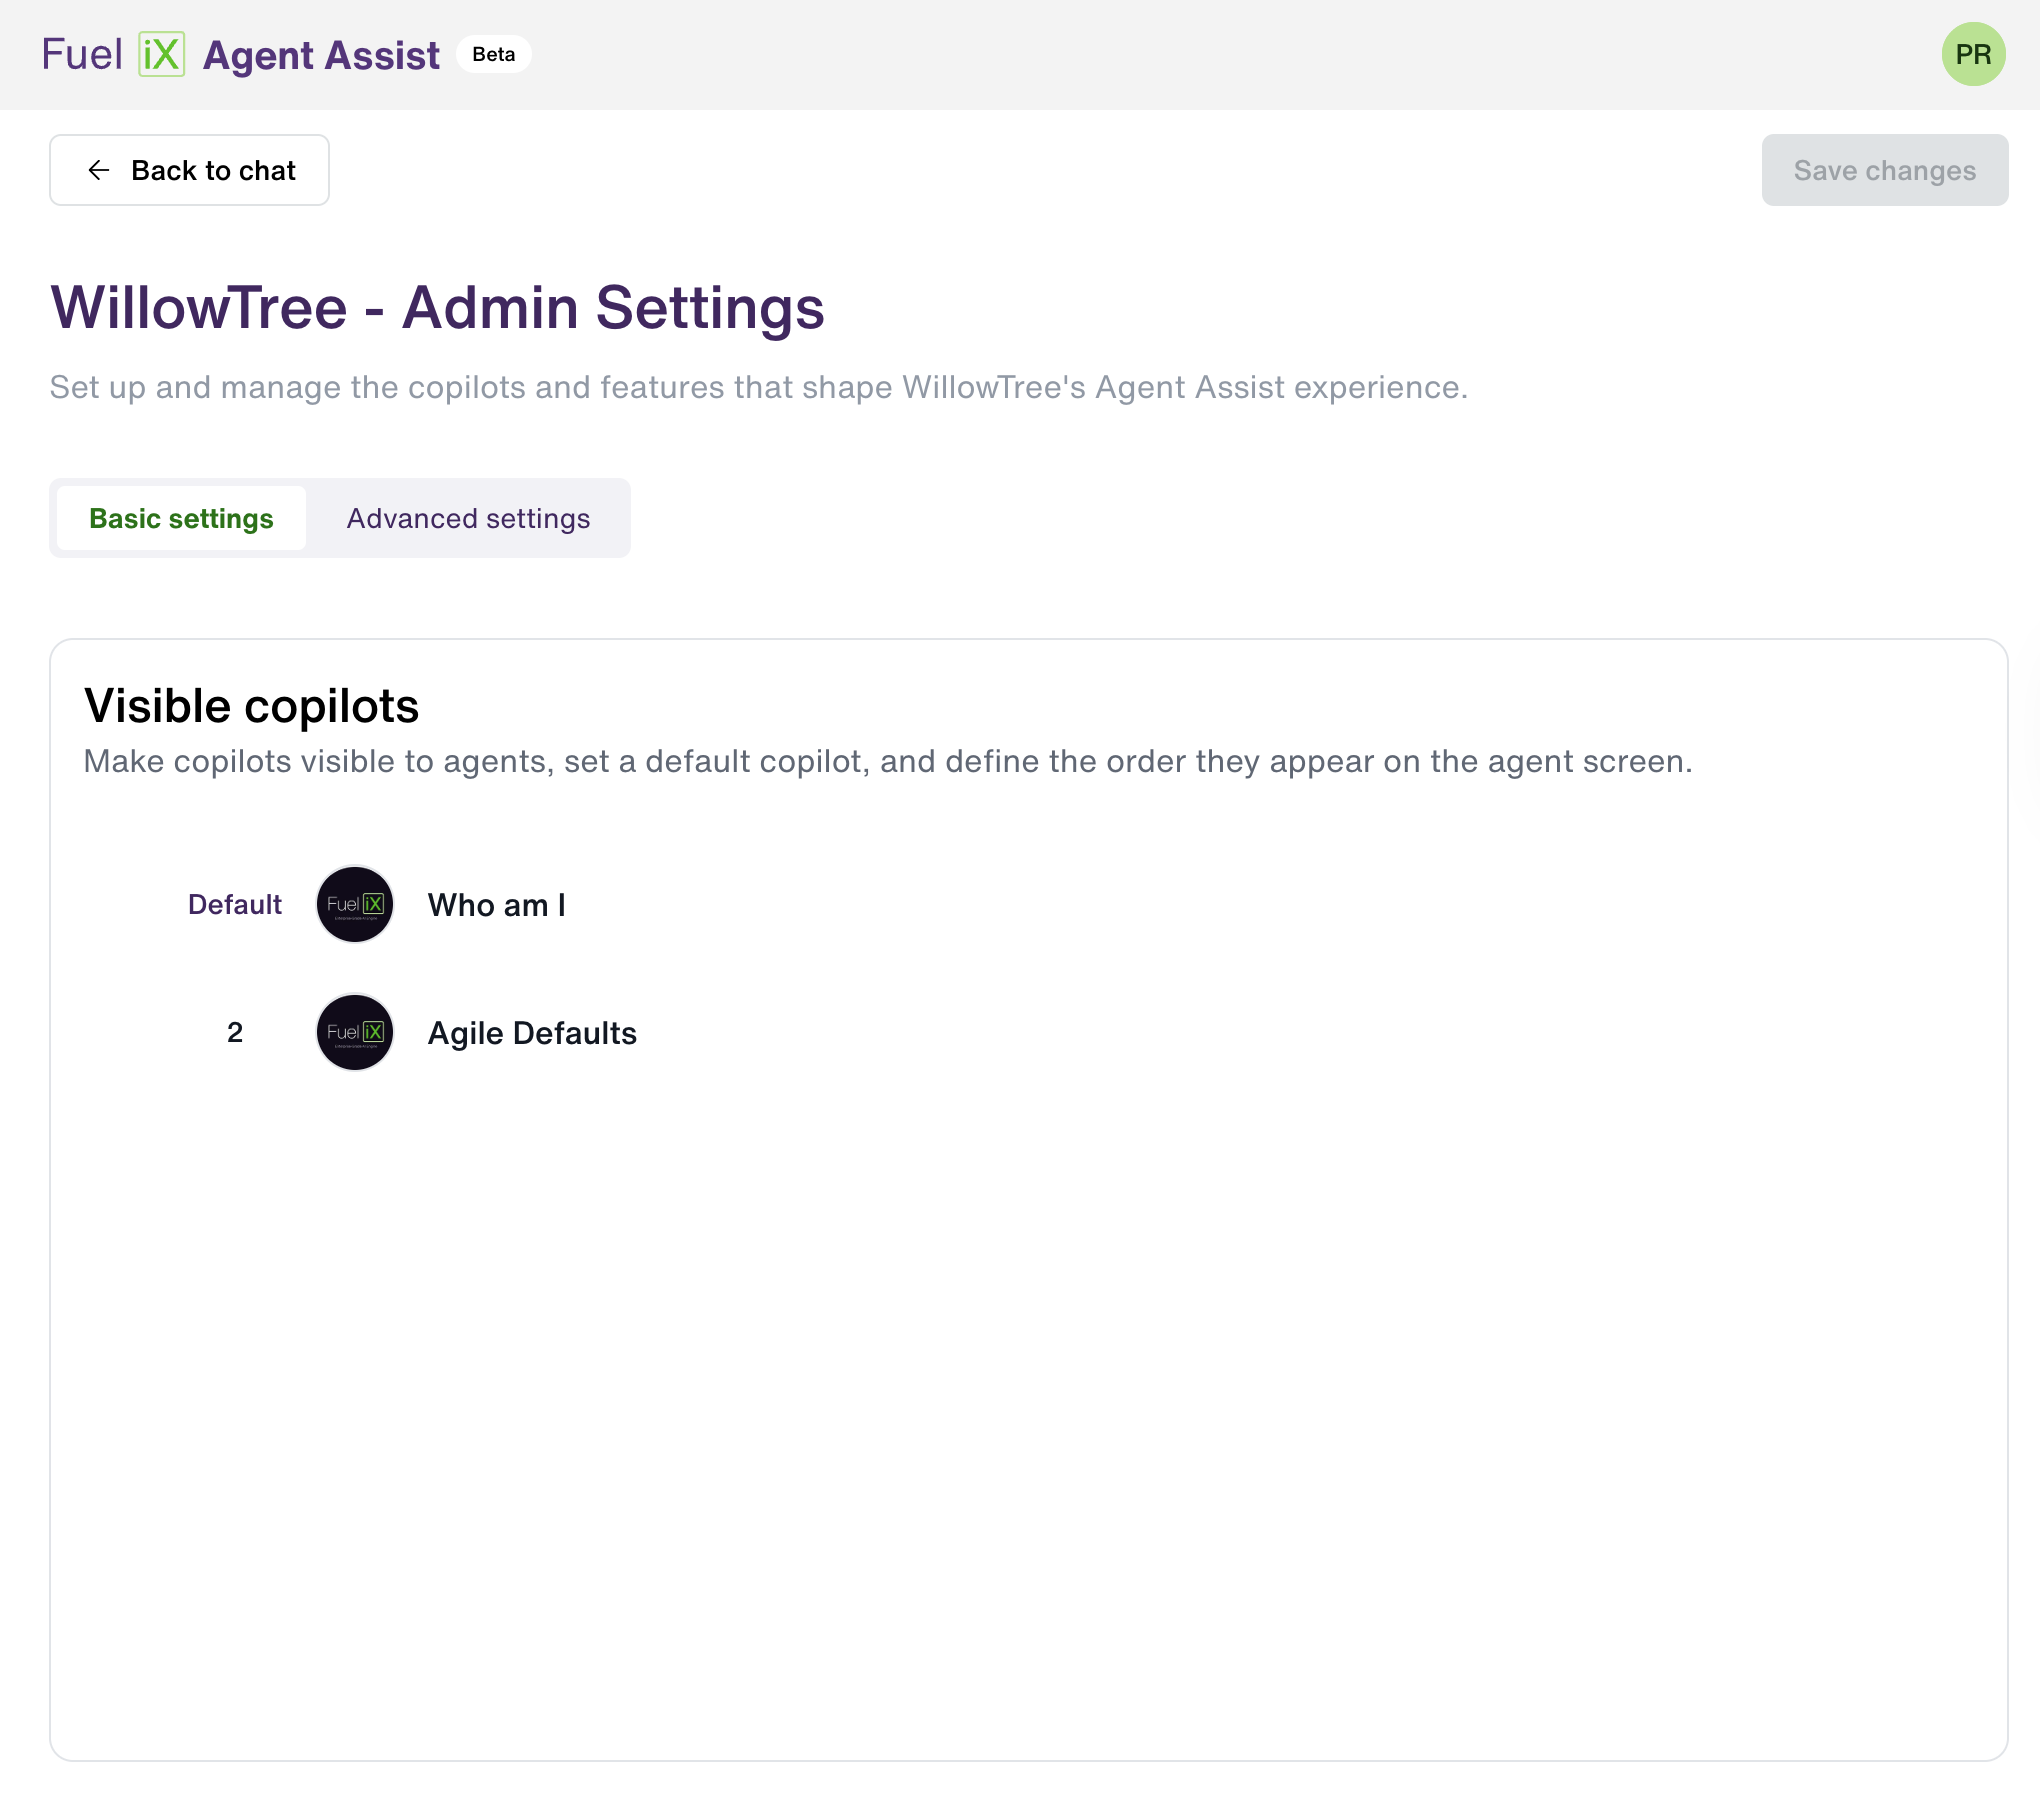
After clicking Admin Settings, you will be redirected to the main settings page. The page is organized into two main tabs: Basic settings and Advanced settings.
5. Basic Settings
The Basic settings tab is where you control which copilots are active and available for agents. The page is divided into two main areas: Visible copilots and More copilots.
5.1 Visible Copilots
This section shows the list of copilots that are currently active and available for agents to interact with. You can reorder them by clicking and dragging.
You could have a Maximum of 25 active copilots available for agents.
5.2 More Copilots
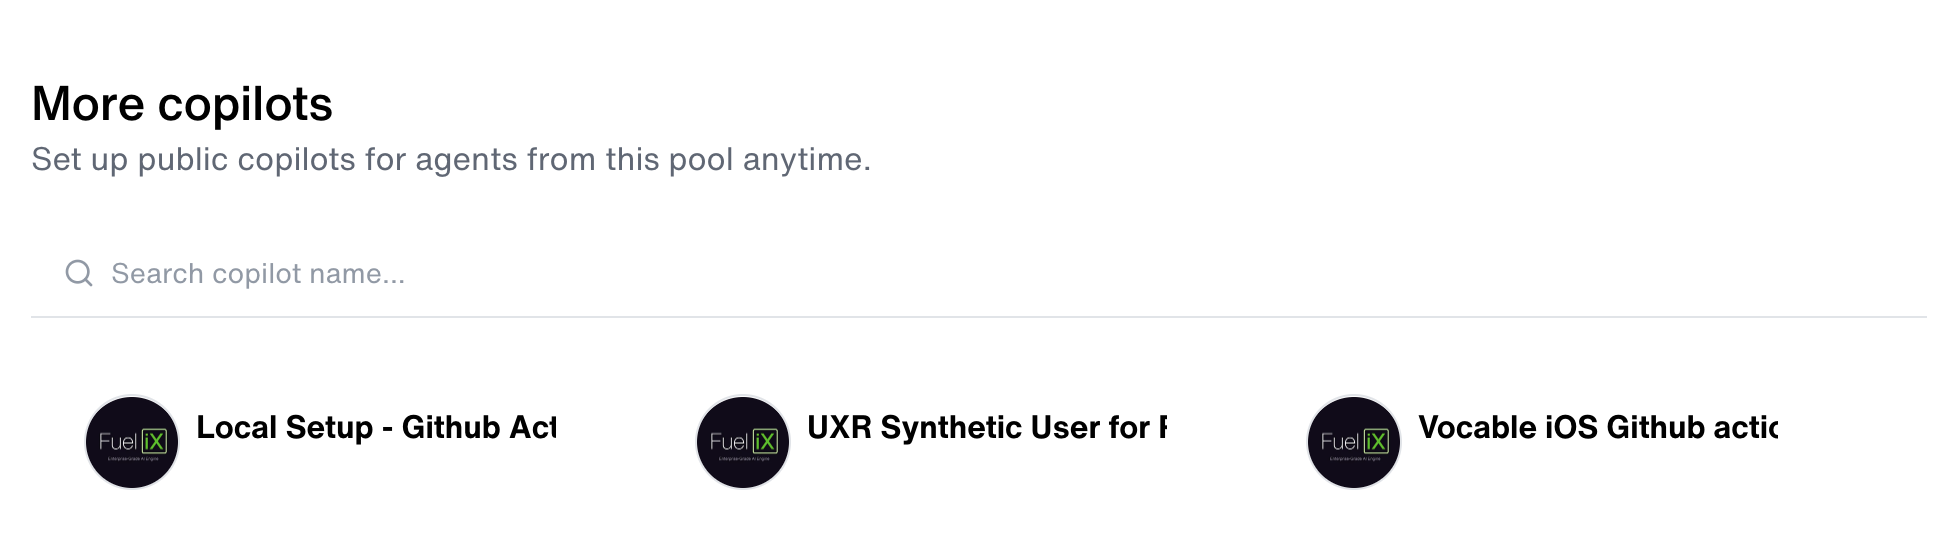
This section is a library of all copilots available within your organization. From here, you can find copilots and make them visible to agents.
- Search: Use the "Search copilot name..." bar to quickly find a specific copilot.
- Make Visible: Click and drag a copilot from the "More copilots" pool up into the "Visible copilots" list to make it active for agents.
- Note: Only public or official copilots can be made visible. Private copilots cannot be moved.
6. Advanced Settings
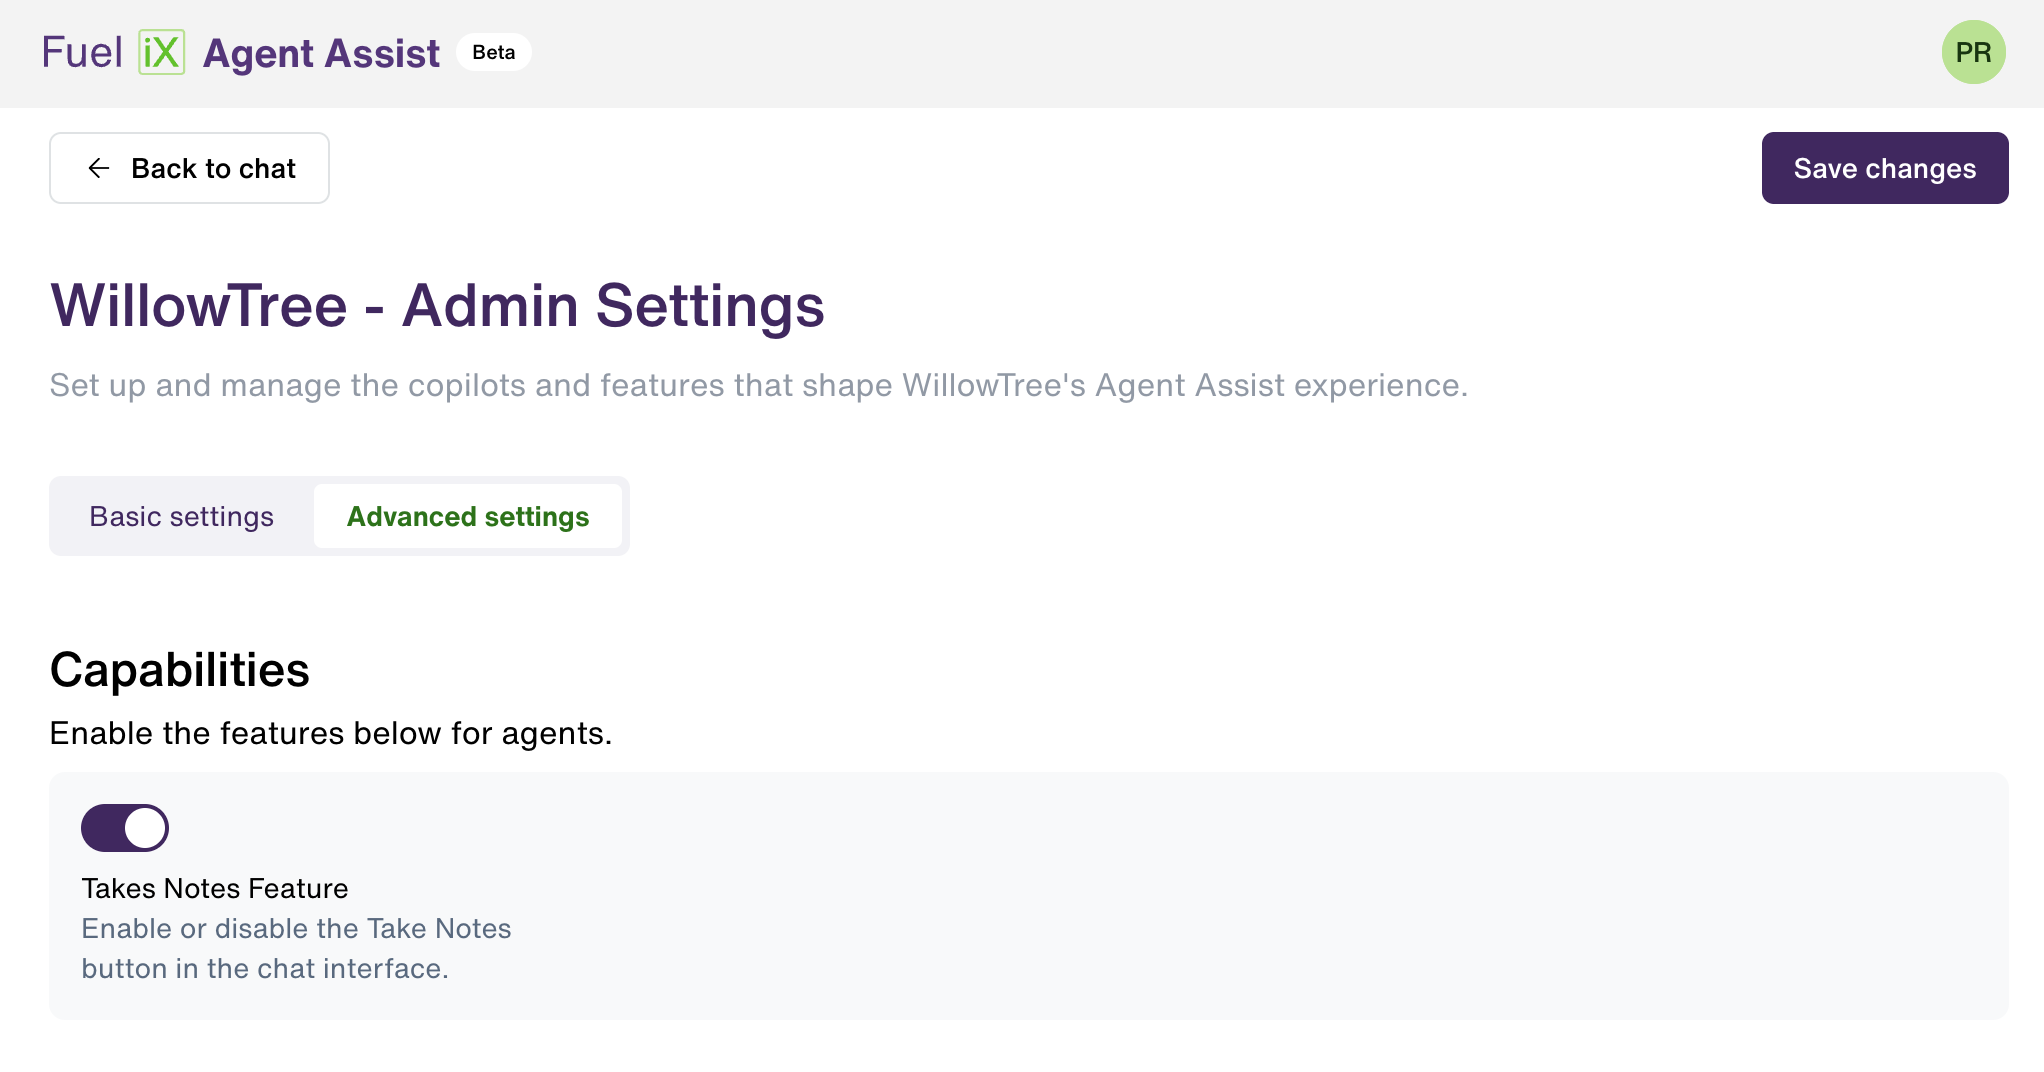
The Advanced settings tab allows you to manage global features, or "Capabilities," that affect all agents using the platform.
6.1 Managing Capabilities
Capabilities are system-wide features that you can turn on or off for all agents from a single place.
- Click on the Advanced settings tab.
- Locate the feature you wish to configure under the Capabilities section.
- Use the toggle switch next to the feature name to enable or disable it.
- Enabled: The toggle will be colored (e.g., purple). The feature will be active for all agents.
- Disabled: The toggle will be grey. The feature will be turned off for all agents.
Example: Takes Notes Feature
This feature controls the visibility of the "Take Notes" button in the agent's chat interface. Enabling it makes the button appear for agents, while disabling it removes the button.
7. Saving Your Changes
Crucially, any changes made in either the Basic settings or the Advanced settings tab are not saved automatically.
After you have finished arranging copilots or toggling capabilities:
- Click the Save changes button in the top-right corner of the page.
- Your new configuration will be saved and applied for all agents.
Warning: If you navigate away from this page without clicking Save changes, all your modifications will be lost.
Updated 5 months ago